Integration Tutorial
Introduction
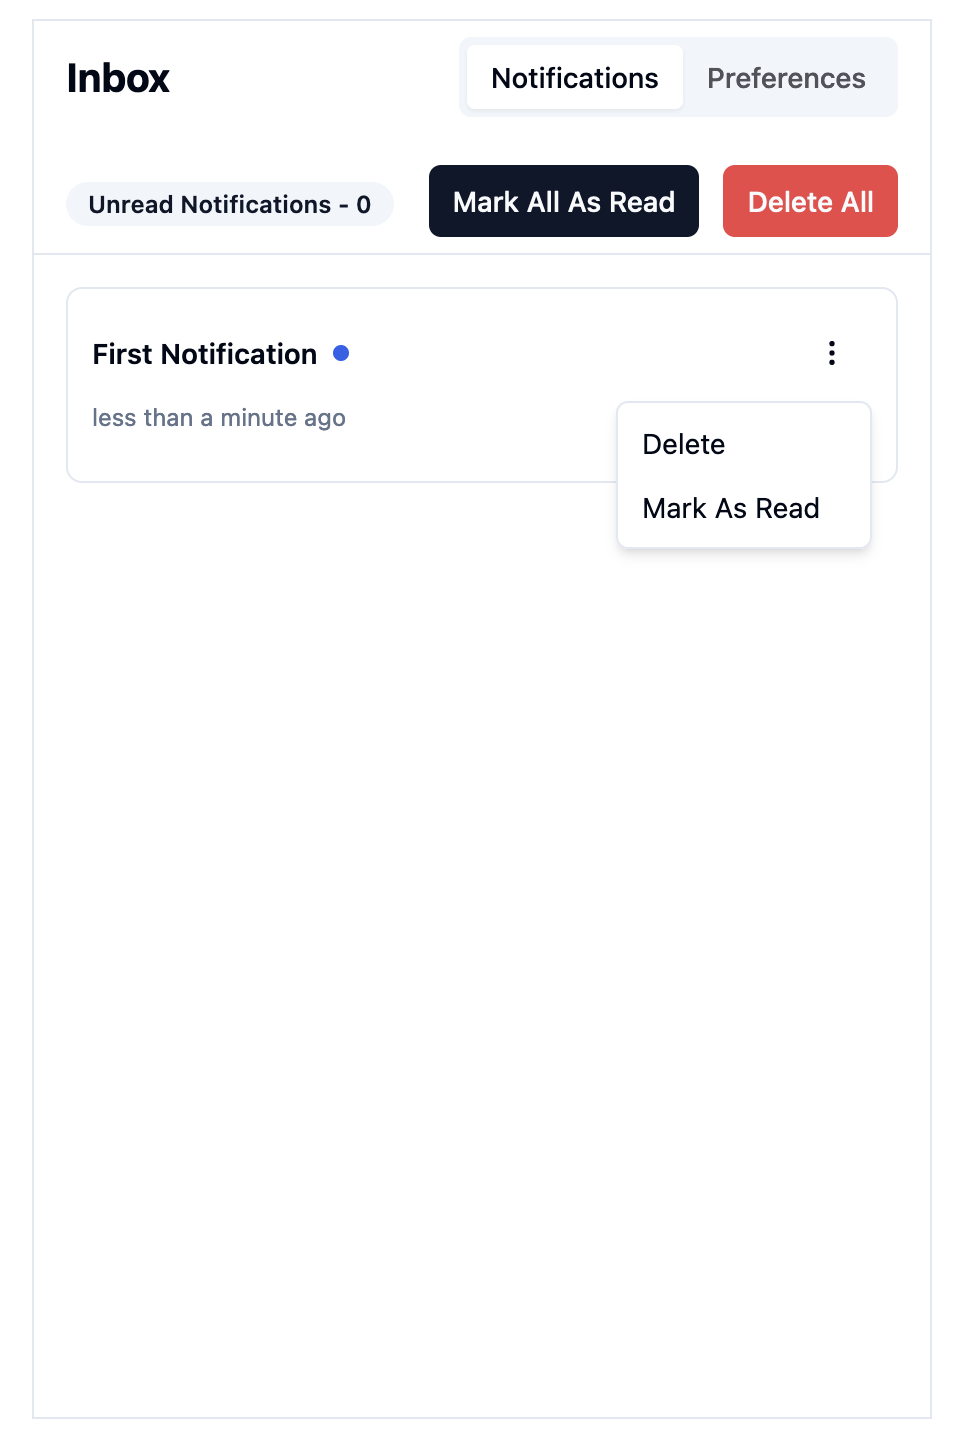
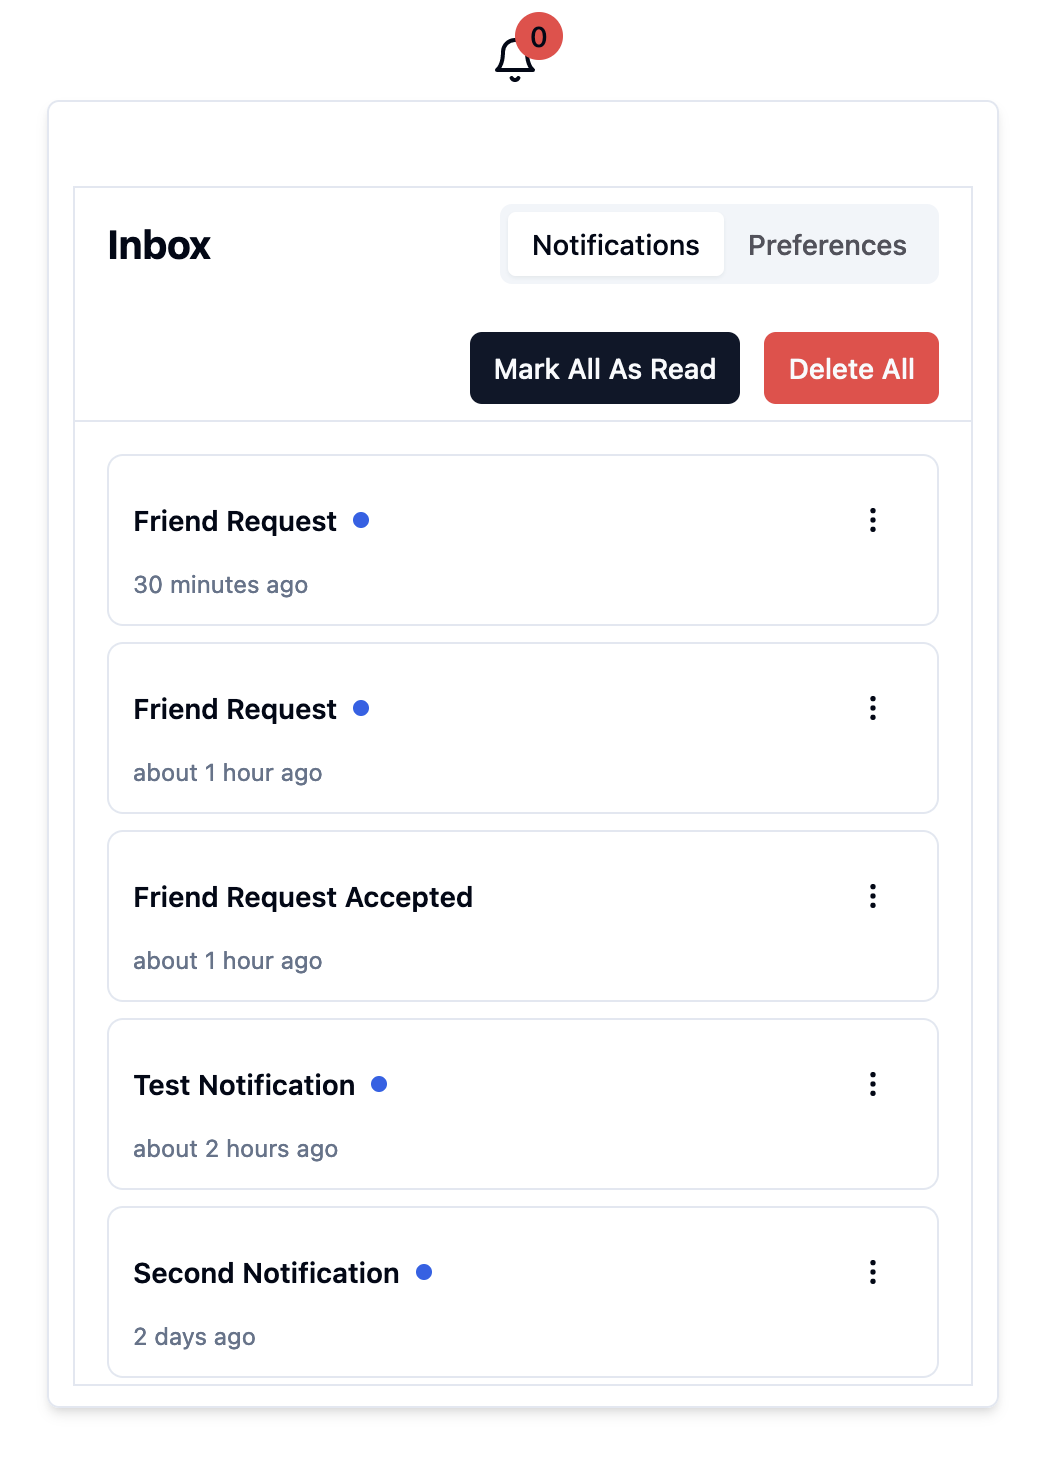
Learn how to create a notification center and preference manager using React Hooks. You have the ability to customize the UI to suit your specific use case. The finished notification panel of this tutorial will look like this.

Pre-requisites:
To continue this tutorial, you’ll first need the following:
ENGAGESPOT_API_KEY: You can find your ENGAGESPOT_API_KEY from your Engagespot Console,API CredentialsPage.USER_ID: As explained in the basic concepts chapter,USER_IDshould be any value to uniquely identify your app's users. It can be their email id, or UUID or a numerical id from your database.
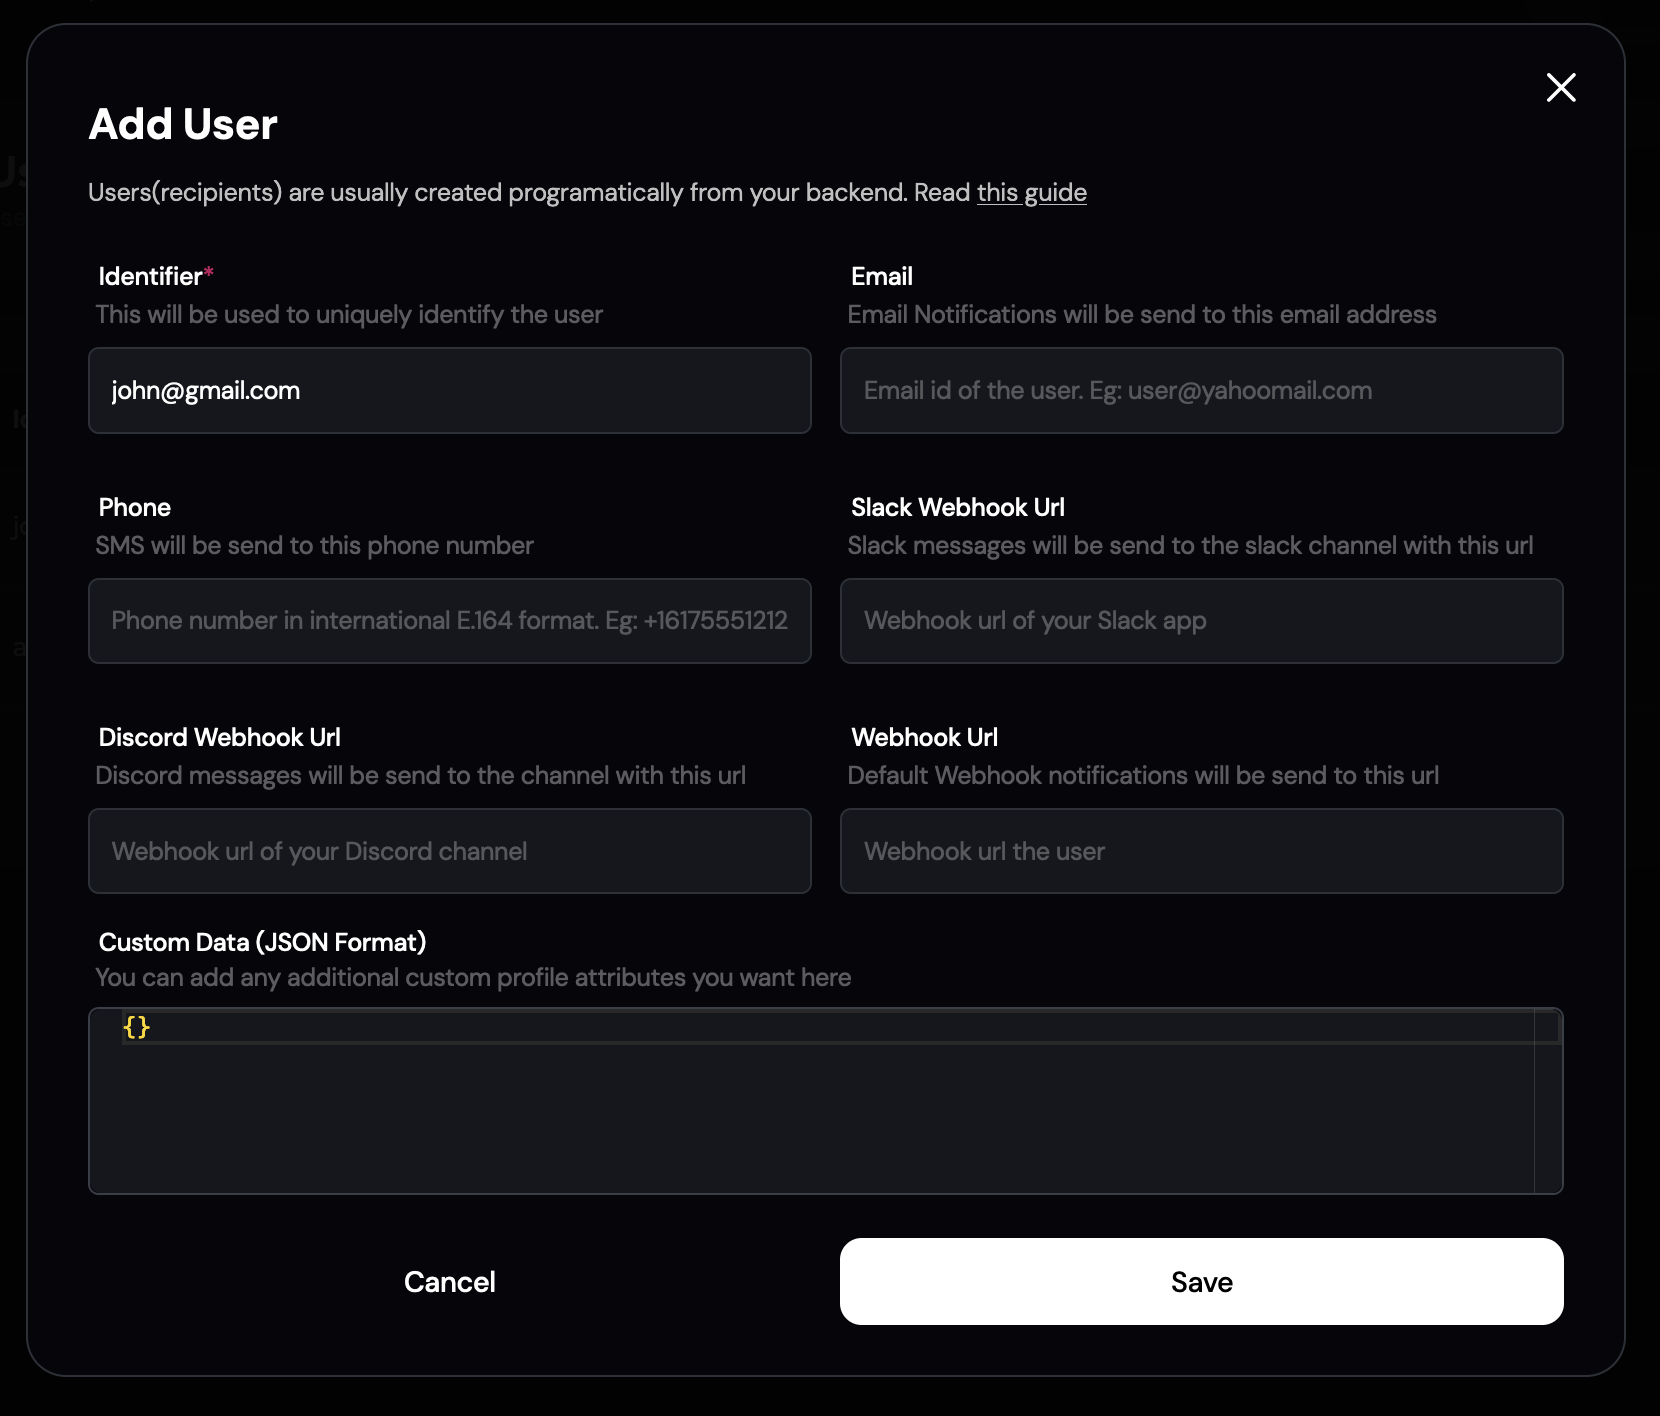
USER_ID should comes from your backend in real applications. But since this is a tutorial, we can create a dummy user. Head over
to the Users(Recipients) Page in your Engagespot Console and click on the New User button. A pop up will appear, add john@gmail.com to the Identifier input and click Save. We will use this dummy user to send test notifications to.
Setting up the project
Our recommended way of following along this tutorial would be to clone the Engagespot Examples repository on GitHub to follow step-by-step instructions for building a notification center and preference manager using React Hooks. You can focus on individual steps and the hook details without worrying about the UI.
git clone https://github.com/Engagespot/engagespot-examples
cd examples-react-hooks-vite-tutorial
npm i
npm run dev
OR
If you prefer to follow along manually and creating your own ui. All you need to do is add @engagespot/react-hooks package to
your React application and follow the tutorial steps.
- npm
- yarn
- pnpm
npm install @engagespot/react-hooks
yarn add @engagespot/react-hooks
pnpm install @engagespot/react-hooks
Adding necessary env
The ENGAGESPOT_API_KEY and USER_ID is needed to authenticate our app against the Engagespot API. We will take this from
the env. Please Note that in real world applications USER_ID comes from your database. But for this tutorial we will use
the USER_ID of the dummy user we created earlier for testing.
VITE_ENGAGESPOT_USER_ID = john@gmail.com
VITE_ENGAGESPOT_API_KEY = `YOUR_ENGAGESPOT_API_KEY`
Sending Test Notifications
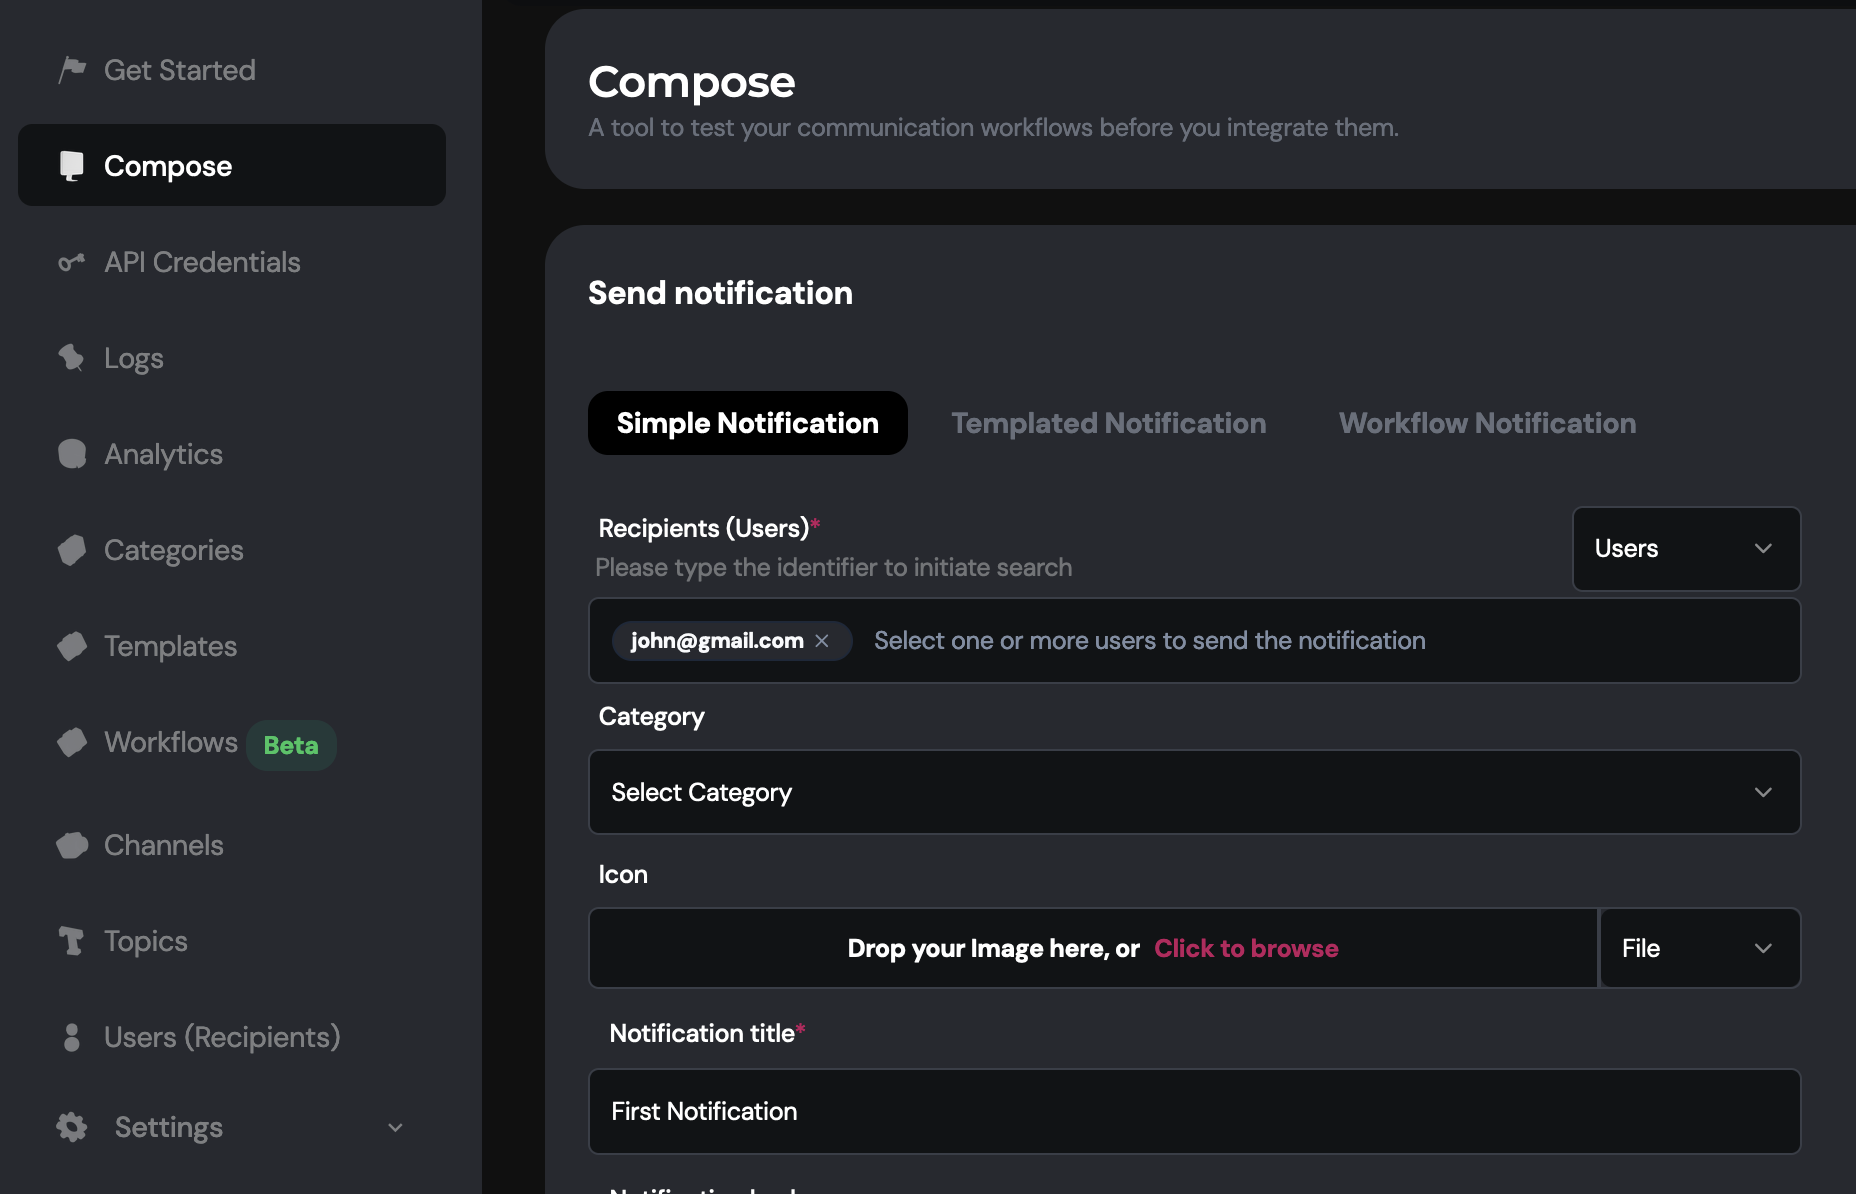
Before creating the notification panel, ensure you know how to send test notifications for your app. Visit the Compose page in your Engagespot Console, select the dummy user 'john@gmail.com,' enter a notification title, and click Send Notification. Congratulations on sending your first notification!. It should appear when we initialize our app.
Creating Notification Panel
Step 0 - Initializing the Engagespot Provider
Start by wrapping your application with the Engagespot Provider component. This authenticates your app against the Engagespot API using a userid and API key, and makes all Engagespot methods and values accessible throughout your application.
import { EngagespotProvider } from '@engagespot/react-hooks';

function App() {
  return (
    <EngagespotProvider
      options={{
        userId: import.meta.env.VITE_ENGAGESPOT_USER_ID,
        apiKey: import.meta.env.VITE_ENGAGESPOT_API_KEY,
      }}
    >
      <Tutorial />
    </EngagespotProvider>
  );
}
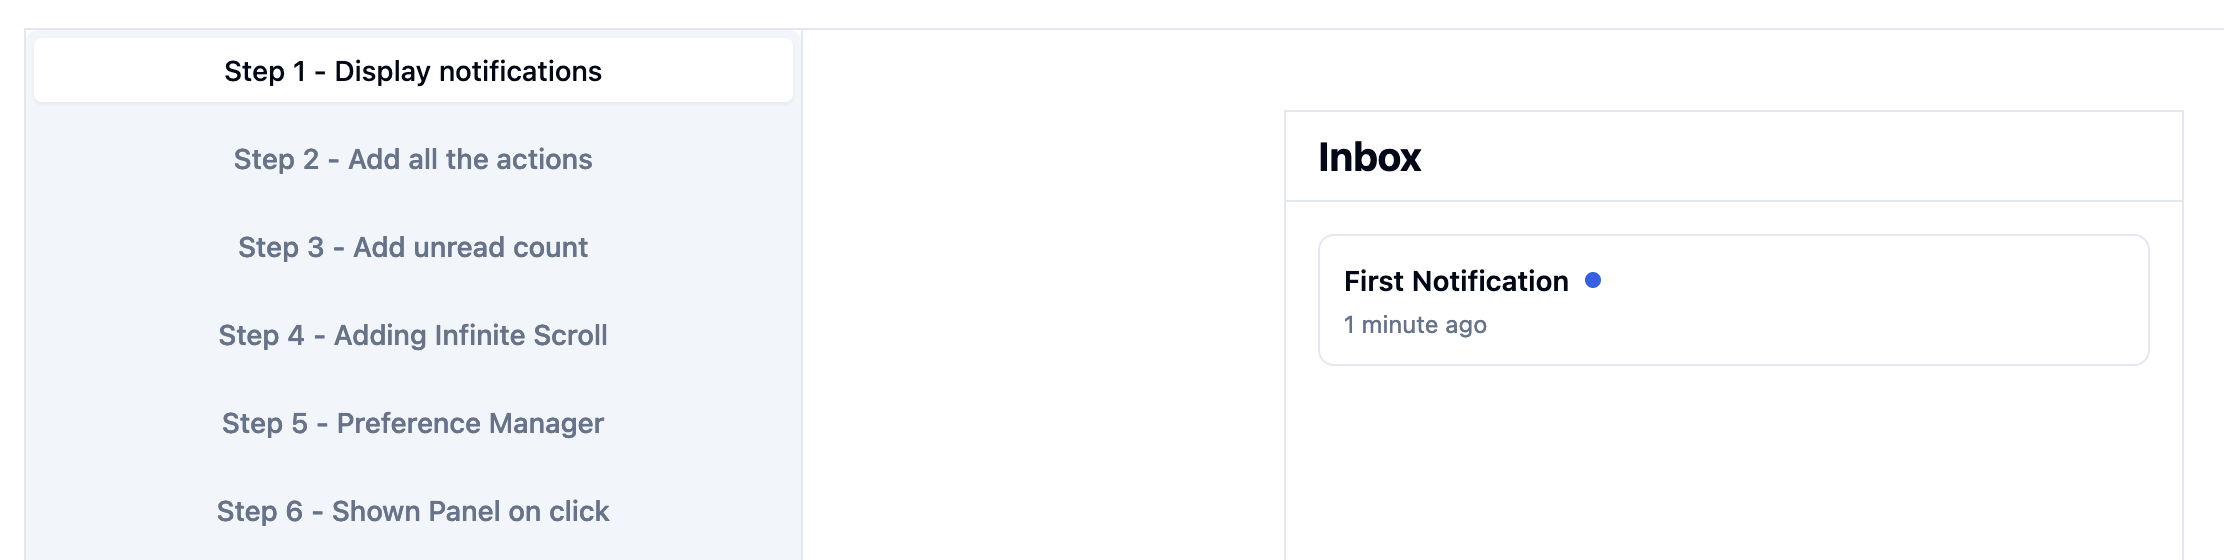
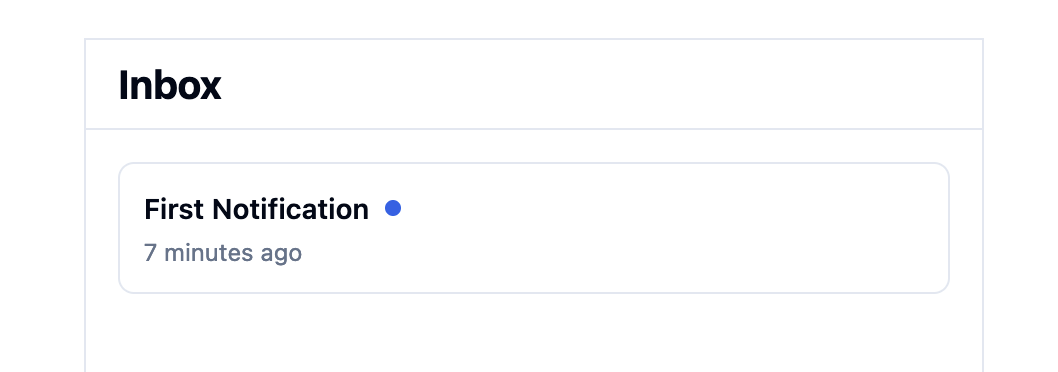
Step 1 - Display notifications
Lets start off small, we will just create a notification center panel and map out all the notifications. To get all the notifications, lets use the useFeed hook. It returns all the states of the notification feed including an array of notifications.
import { useFeed } from '@engagespot/react-hooks';

const { notifications } = useFeed();

const NotificationFeed = () => {
  return (
    <div>
      {notifications.map(notification => (
        <Notification notification={notification} key={notification.id} />
      ))}
    </div>
  );
};
Use the values from the notification object to craft a notification. And also make sure to add a placeholder image if there are no notifications.
const Notification = ({notification}: {notification:EngagespotNotification}) => {
const { title, message, clickedAt, createdAtRelative } = notification

  return (
    // custom code
  );
};
Current UI
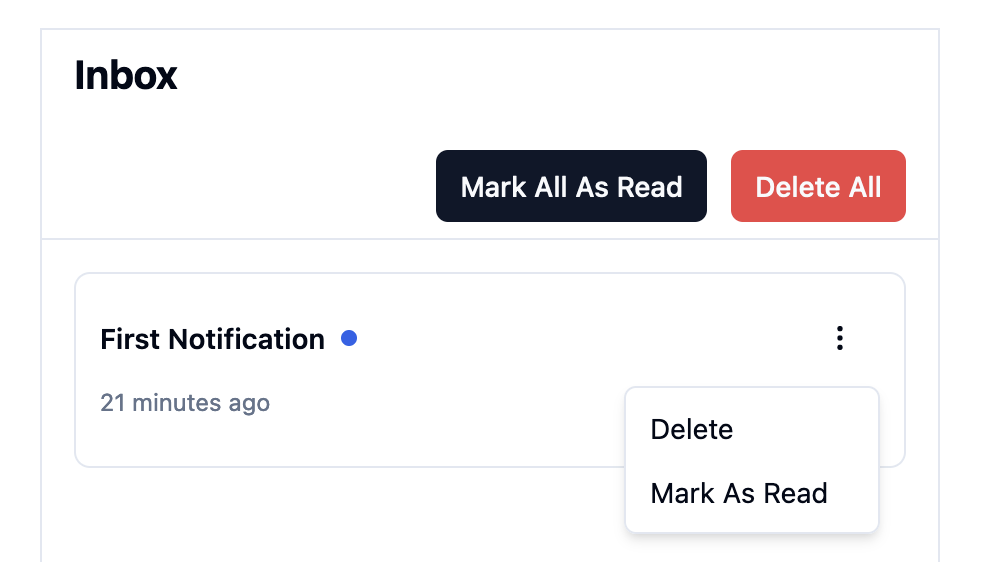
Step 2 - Add all the actions
The actions that we would need in notification panel are,
- Delete a single notification
- Mark a single notification as read
- Delete All notifications
- Mark As Read All notifications
- Mark notifications as seen
For doing all these actions, we have the useActions hook.
import { useActions } from '@engagespot/react-hooks';

const {
  deleteNotification,
  markAsRead,
  deleteAllNotifications,
  markAllAsRead,
  markAsSeen,
} = useActions();
Current UI
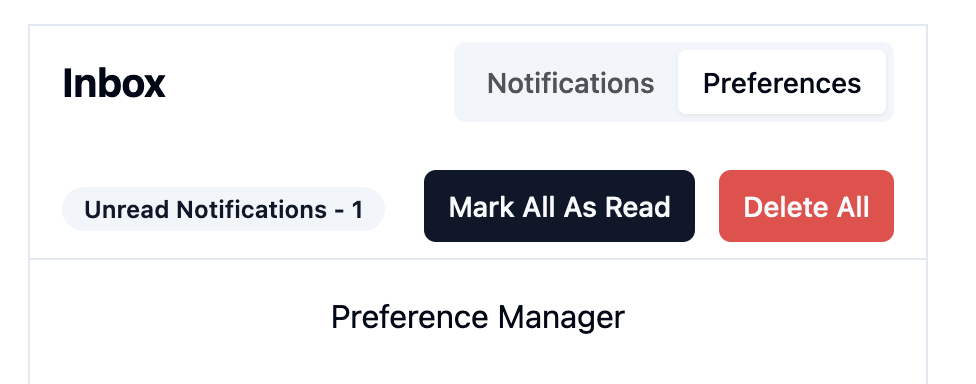
Step 3 - Add unread count
The unread count shows the notification which we have not yet seen. So to hide the notification center from our view, let's also create a tab to show the preference manager, which we will need later.
For getting the unseenCount, we have the useUnseenCount hook.
const unseenCount = useUnseenCount();
Switch to the preference manager tab, and send a test notification. Now you should see the unread count as 1.
Current UI
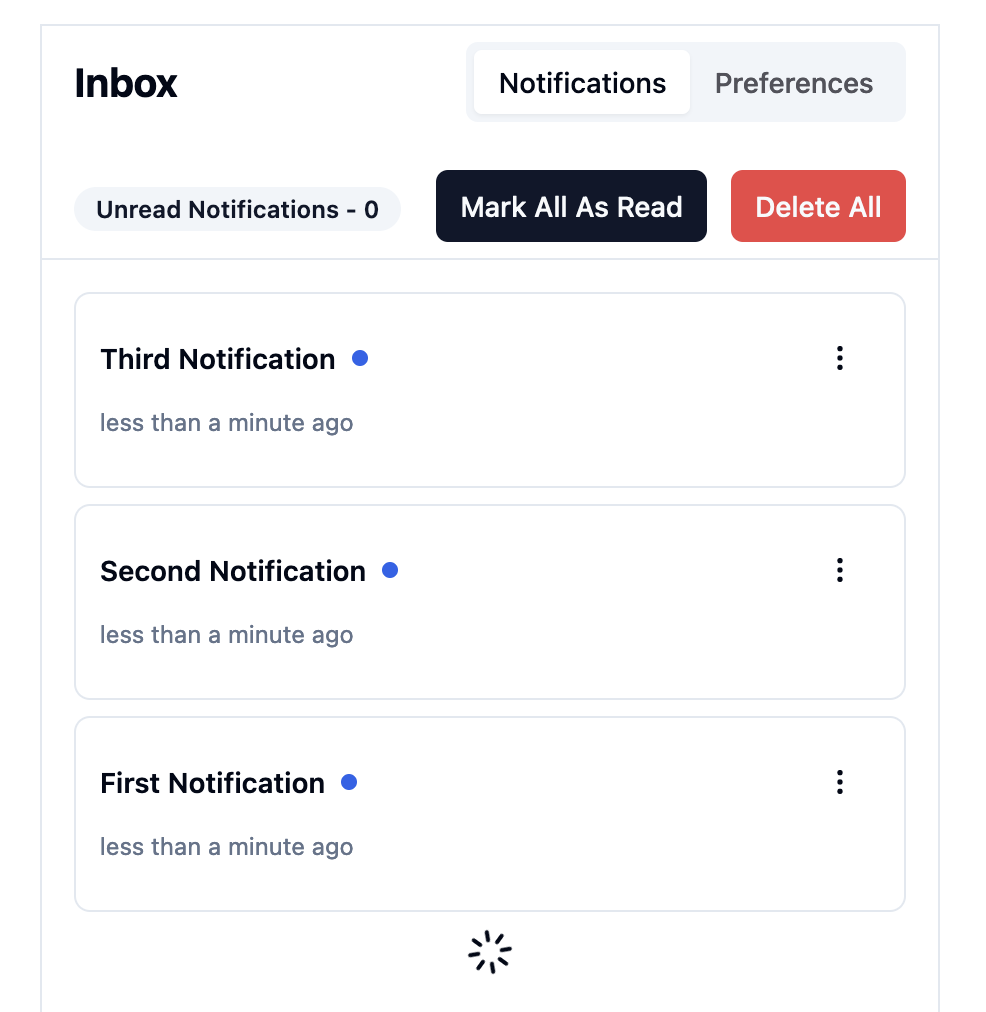
Step 4 - Adding Infinite Scroll
You could have a large number of notifications in your feed. Engagespot by default gives you 10 notifications in the initial api call. To change this you can add a prop called itemsPerPage in your EngagespotProvider.
<EngagespotProvider
    options={{
        userId: import.meta.env.VITE_ENGAGESPOT_USER_ID,
        apiKey: import.meta.env.VITE_ENGAGESPOT_API_KEY,
        itemsPerPage: 7,
    }}
>
    <Tutorial />
</EngagespotProvider>
With the introduction of pagination, we need more states like
- is it loading
- is there more notifications
- function to load more notifications
- refetch all the the notifications
For all these, we can again use the useFeed hook.
const { notifications, loading, loadMore, refresh, hasMore } = useFeed();
Current UI
Step 5 - Adding Preference Manager
A Notification Preference Manager gives users power to control their notification preferences. They can choose which channels they want to receive notifications from each categories.
For creating a notification preference center we need to be able to,
- show the current preferences
- update the current preferences
For all these, we can use the usePreferences hook.
const { preferences, setPreferences } = usePreferences();
Another useful feature would be a hook for handling all webPush operations related to our preferences. No worries, we’ve got you covered! We can utilize the useWebPush hook for this.
const { subscribe, webPushState } = useWebPush();

// webPushState type
type PermissionState = 'denied' | 'granted' | 'default';
Current UI

Step 6 - Show Panel on click
In most web applications, the notification panel is typically revealed when users click an icon in the navbar. To enhance the user experience, let's also relocate the unread count from within the panel to a more prominent position near the icon.
Final UI
Wrapping Up
That's a wrap!. You have everything you need for a basic notification panel, But before you go please also checkout some additional commonly used features that could prove valuable to you. These enhancements will take your notification system to the next level!
Additional Features
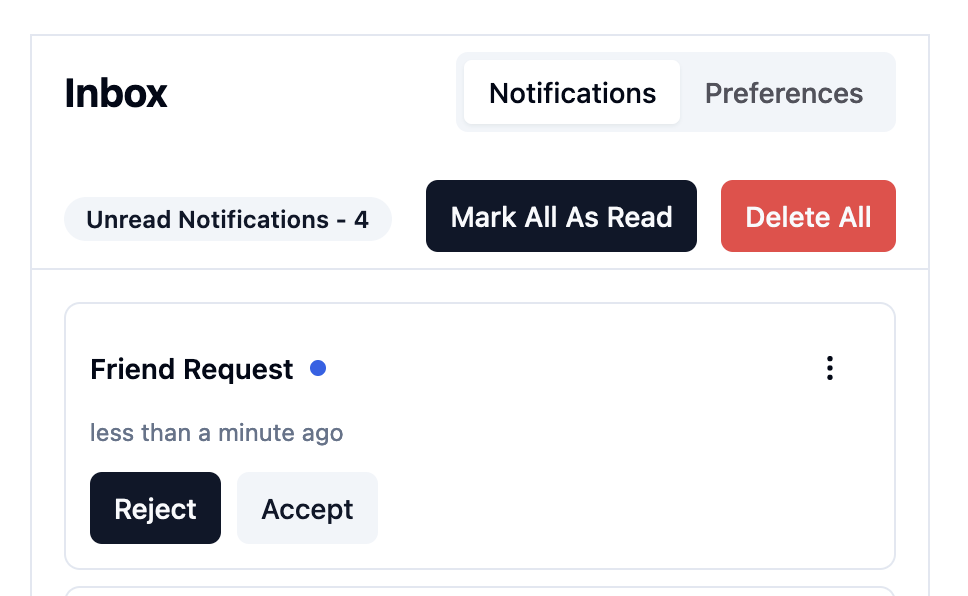
Actionable Items
Before creating the actionable notifications using hooks, ensure you know about actionable notifications from the Working with Actionable Elements Docs.
From the notifications retrieved via the useFeed hook, pay attention to the blocks data within each notification. This data allows you to create actionable notifications.
const Notification = ({notification}: {notification:EngagespotNotification}) => {
const { blocks } = notification

  return (
    <>
    {blocks?.map((block) => (
      <NotificationBlock block={block}/>
    ))}
    </>
  );
};

type EngagespotNotification : {
  ... // rest of the types
  blocks?: {
    id?: string;
    type?:
      | 'box'
      | 'typography'
      | 'blue-dot'
      | 'rating-star'
      | 'card'
      | 'button'
      | 'image'
      | 'textarea'
      | 'input';
    text?: string;
    src?: OneOf<
      [
        string,
        {
          blob?: string;
        },
      ]
    >;
    variant?: 'default' | 'primary' | 'secondary';
  }[];
  ... // rest of the types
}
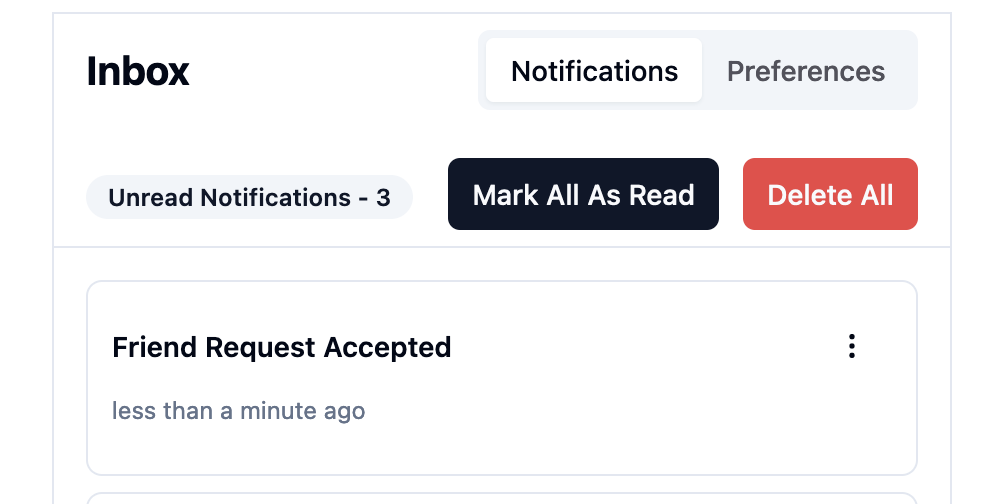
To make notifications actionable and manage their state, you can utilize the changeState method provided by the useActions hook.
const { changeState } = useActions;

changeState({
  id: notificationId,
  /**
   * write your own custom logic here
   */
  state: block.id === 'your_block_id' ? 'your_state' : 'your_state',
});
Listening for events
When you need to listen for specific events and trigger actions accordingly, the useEvent hook comes to the rescue. With this hook, you can seamlessly handle event subscriptions and retrieve relevant data when those events occur. It's a powerful tool for enhancing interactivity in your application.
Let's fire of a toast notification, when you recieve a new notification and show the notification title as the description.
useEvent('notificationReceive', notification => {
  toast({
    title: 'New Notification Recieved',
    description: notification.notification.title,
  });
});

API Reference
If you’re interested in exploring the full range of methods offered by our hooks, We recommend checking out our API Reference for a comprehensive overview. There, you’ll find detailed information on all the available methods.