Working with actionable notifications
Engagespot supports actionable In-App notifications with dynamic buttons and input fields. Our Bubble plugin also supports actionable messages starting from version v3.0.0. In this guide, you will learn how to setup event listeners for actionable components such as button clicks.
Actionable in-app notifications can be created only using Templates. Make sure to read the templates and actionable In-App notification concepts guide before proceeding.
Our In-App action components like buttons do not work properly when debug mode is turned ON in Bubble preview mode.
To turn off debug mode, you can append ?debug_mode=false to your Bubble app preview URL.
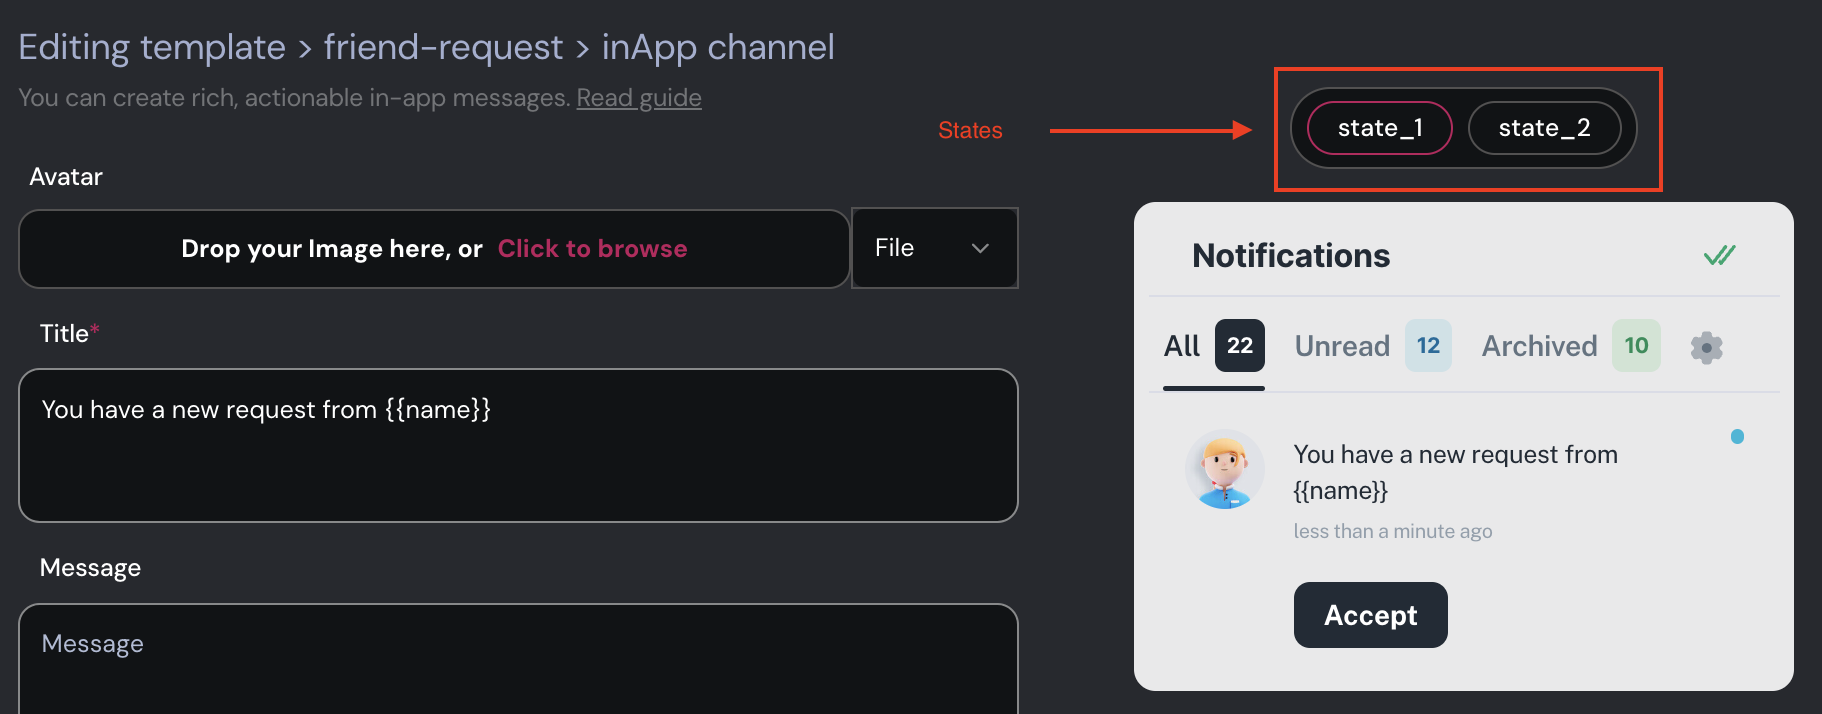
Example scenario
Let's say you have created a template with In-App message that has a single action button. Let it be something like -
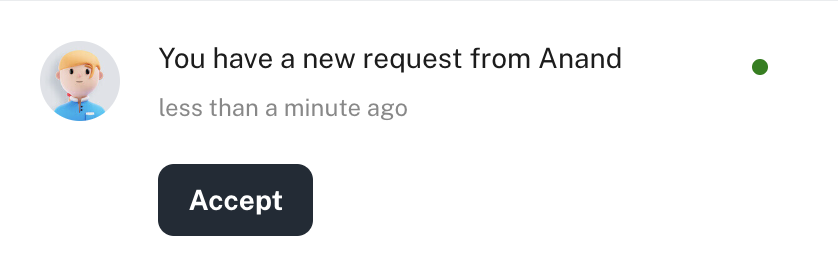
Our goal is to trigger a Bubble workflow when the user clicks on Accept button. Assume that we have included some additional information in the data property while triggering the notification. We need that information in the workflow.
We'll include this JSON in the data field of the notification while
triggering it.
{
  "requestId": "4850290"
}
Adding the event listener for Accept button
-
Make sure you have copied the
blockIdof the accept button from your template editor.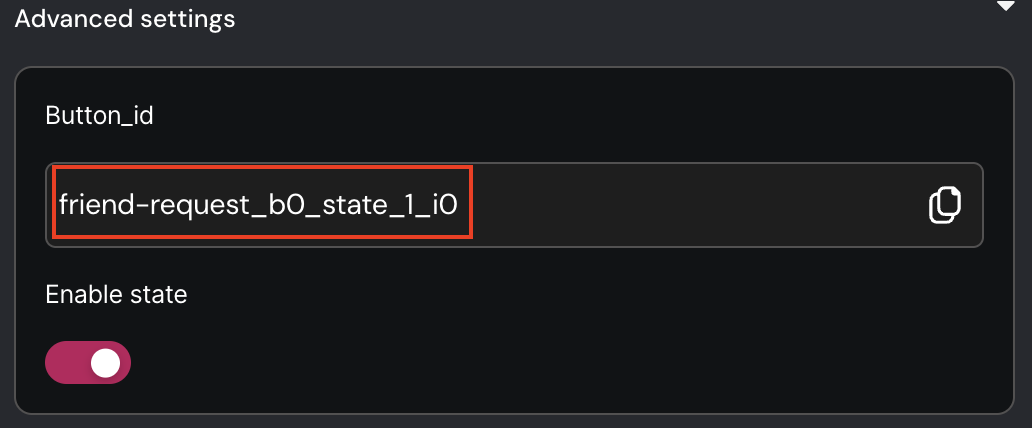
-
Now add the event listener to the
Blocks and their eventsproperty using the Bell icon element editor.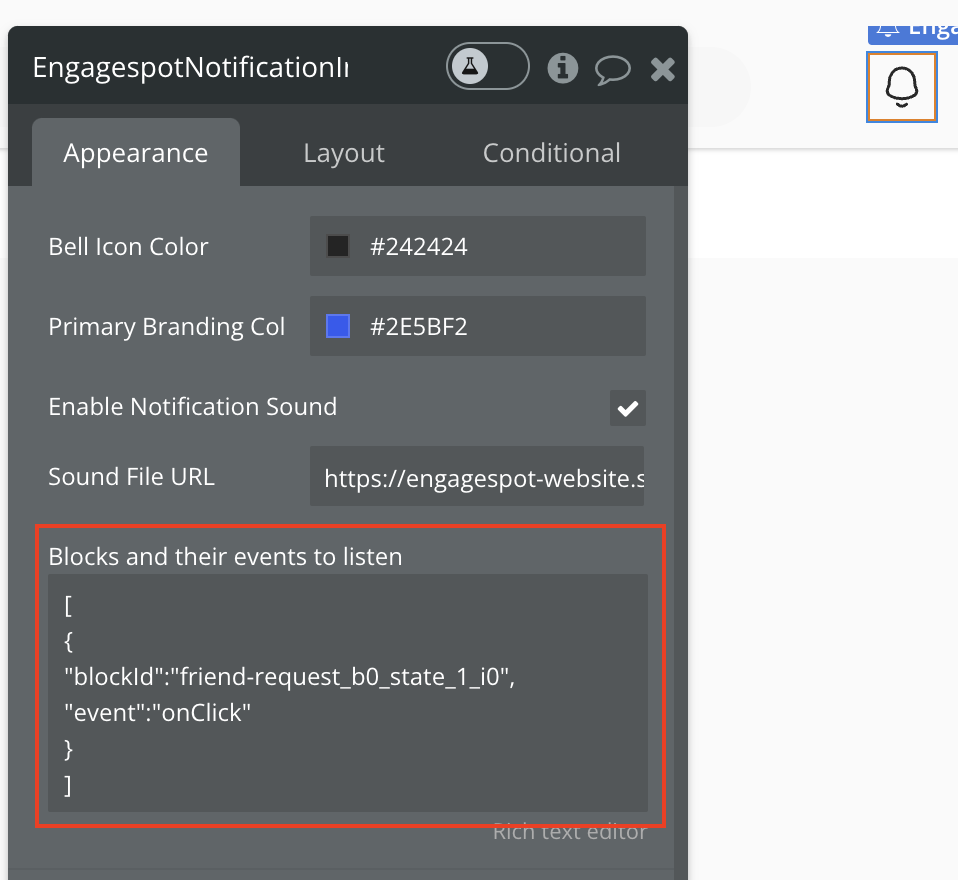
That field expects a JSON Array in the following format
[
    {
        "blockId": "ID_OF_BUTTON_COPIED_FROM_TEMPLATE_EDITOR",
        "event": "onClick"
        "getValue": "ID_OF_THE_INPUT_FIELD_IF_AVAILABLE_IN_THIS_TEMPLATE"
    }
]
The getValue property can be used to fetch the value of any input fields present in the template. The captured value is
Supported events depending on the element type are:
| Block Type | Event | Description |
|---|---|---|
| Button | onClick | Fires when button is clicked |
| Input | onChange | Fires when value is changed |
| Input | onKeyDown / onKeyUp | Fires when a key is pressed / released |
Now you have successfully added the event listeners.
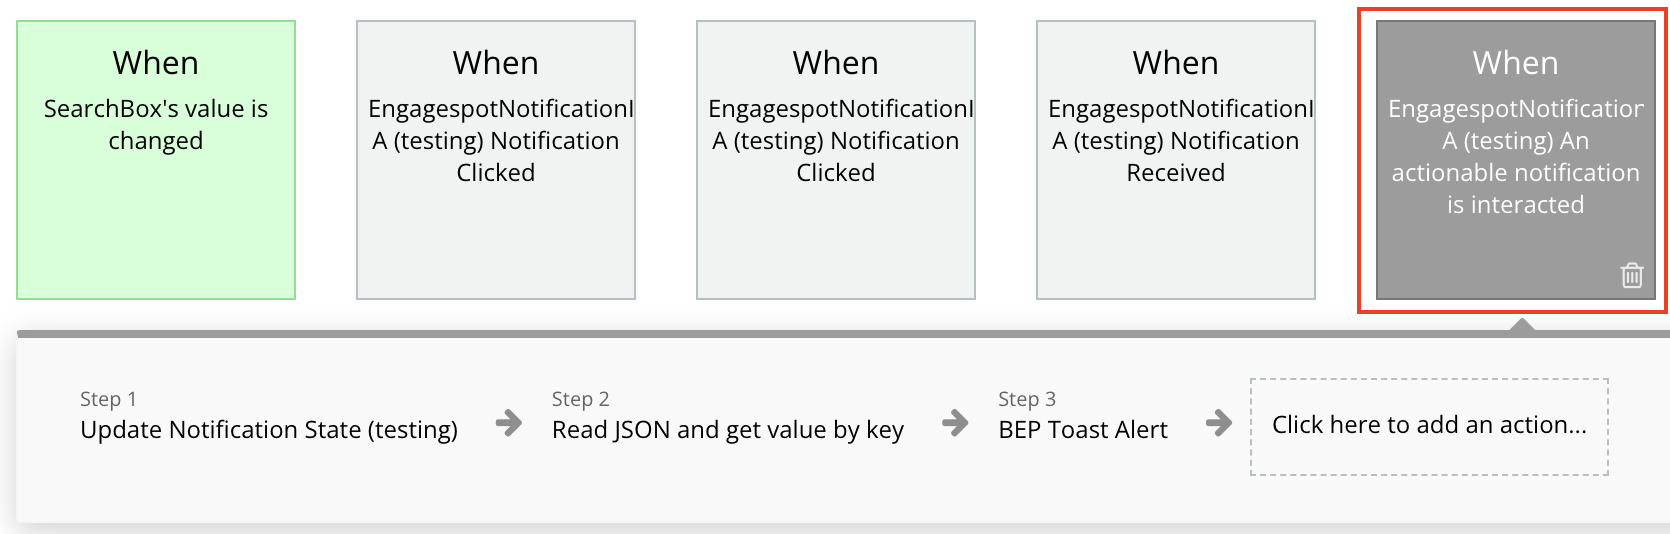
Listening to the events
Whenever the configured event happens (such as user clicking the accept button), Engagespot Bubble plugin publishes a An actionable notification is interacted event in your Bubble app.
You can listen to this event in the Bubble workflow editor and perform any action!
The following Bubble state variables (for the Inbox element) becomes available when the event is triggered 👇.
| Variable | Type | Description |
|---|---|---|
| Interacted Notification ID | Text | ID of the interacted notification |
| Interacted Notification JSON | Text (JSON) | The entire notification object as JSON string. Parse this JSON to extract the data property and other information associated with this notification. |
| Interacted Notification Input Value | Text | If you had passed the getValue property to Blocks and their events, the value from that field will be available in this state variable. |
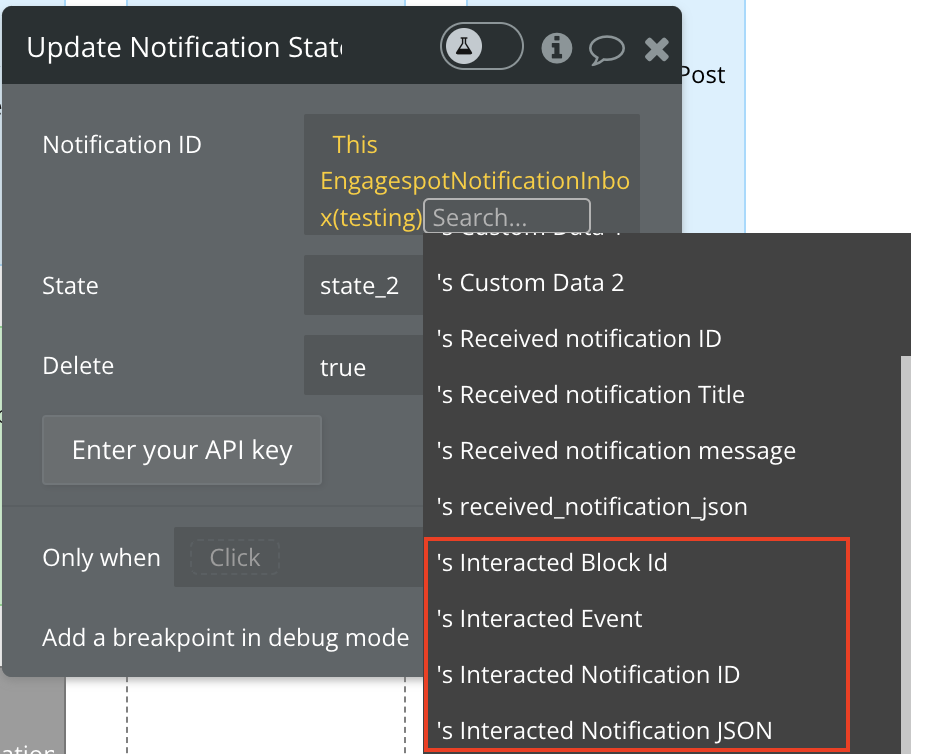
Updating notification state.
To understand the concepts of notification state, make sure to read In-App Concept Guide first.
In the above example, after performing the Accepted workflow on our Bubble app, we can change the state of the notification to accepted!

Updating notification state using Bubble workflow
- Add the
Update Notification Stateaction to theAn actionable notification is interactedevent. - Set the Notification ID to
Interacted Notification IDvariable.
- Set the state to the identifier of the state to which the notification should transition to. You can find the state names from Engagespot template editor.
Done! Now, whenever you take an action, the state of the notification will be changed!