Creating Notification Templates
We're deprecating the Templates feature. You will no longer be able to create new ones. Instead, you should create workflows. Read the workflow documentation here
Notification templates can be created from Engagespot Console -> Templates menu. Engagespot provides a web-based template designer so anyone, even without coding knowledge can design notification templates for any channel.
Consider a template as a particular message that you want to notify your user. For example, a One Time Password, or another user triggered event. Designing a notification template includes 3 steps -
-
- Create a template
-
- Add content for each channel (such as in-app, email, sms etc)
-
- Triggering the notification via API
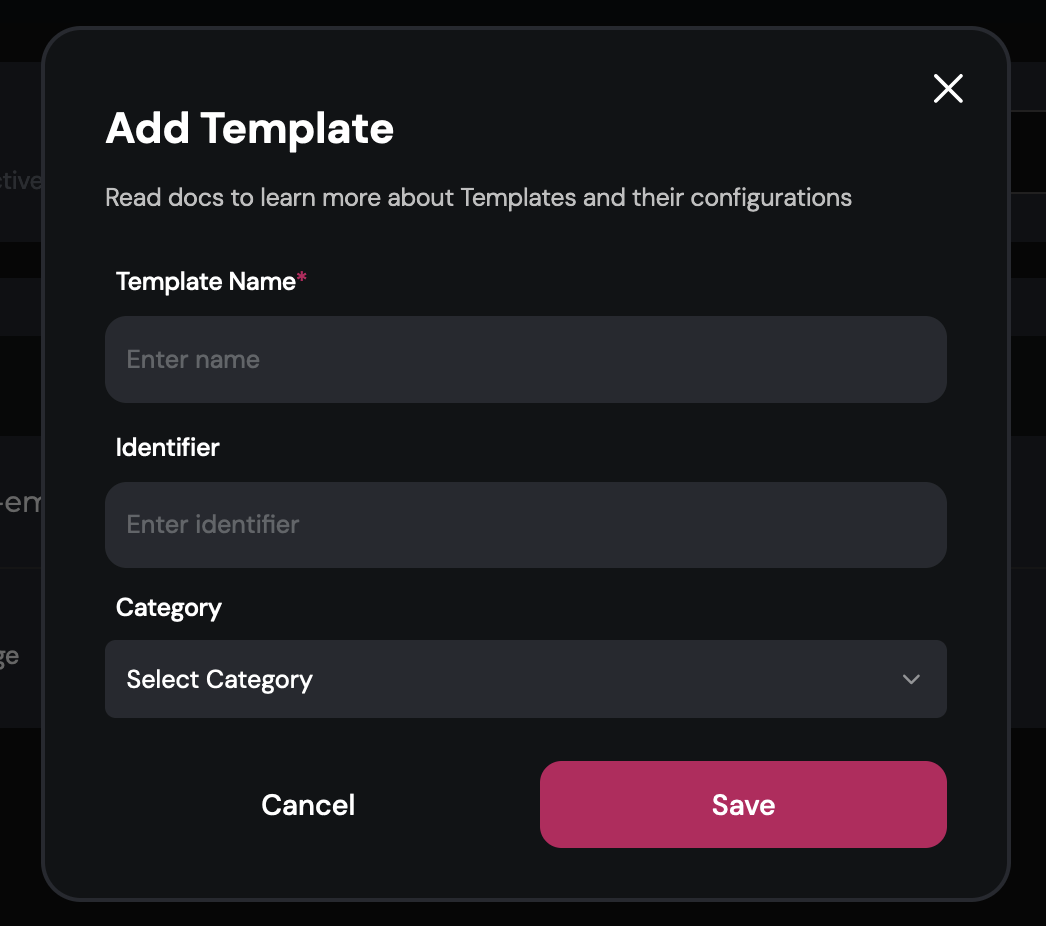
1. Create a template
- Go to the Templates: Navigate to the Templates section in your dashboard.
- Click New Template button: A modal titled Add Template will appear.
- Name Your Template: Give your template a descriptive name (e.g., "Welcome Message").
- Identifier: The system will automatically generate an identifier based on the template name. You can also edit this identifier if needed.
- Categorize (Optional): If you want to organize your templates, select a relevant category.
- Save: Finally, save your template.
2. Add content for each channel
Now you've created a template. You will be automatically redirected to the template content page. To design the notification content, you can add channels to this template.
You can do this by clicking the + icon below the Event Triggered card.
Choose a channel for which you want to design the notification content for this template.
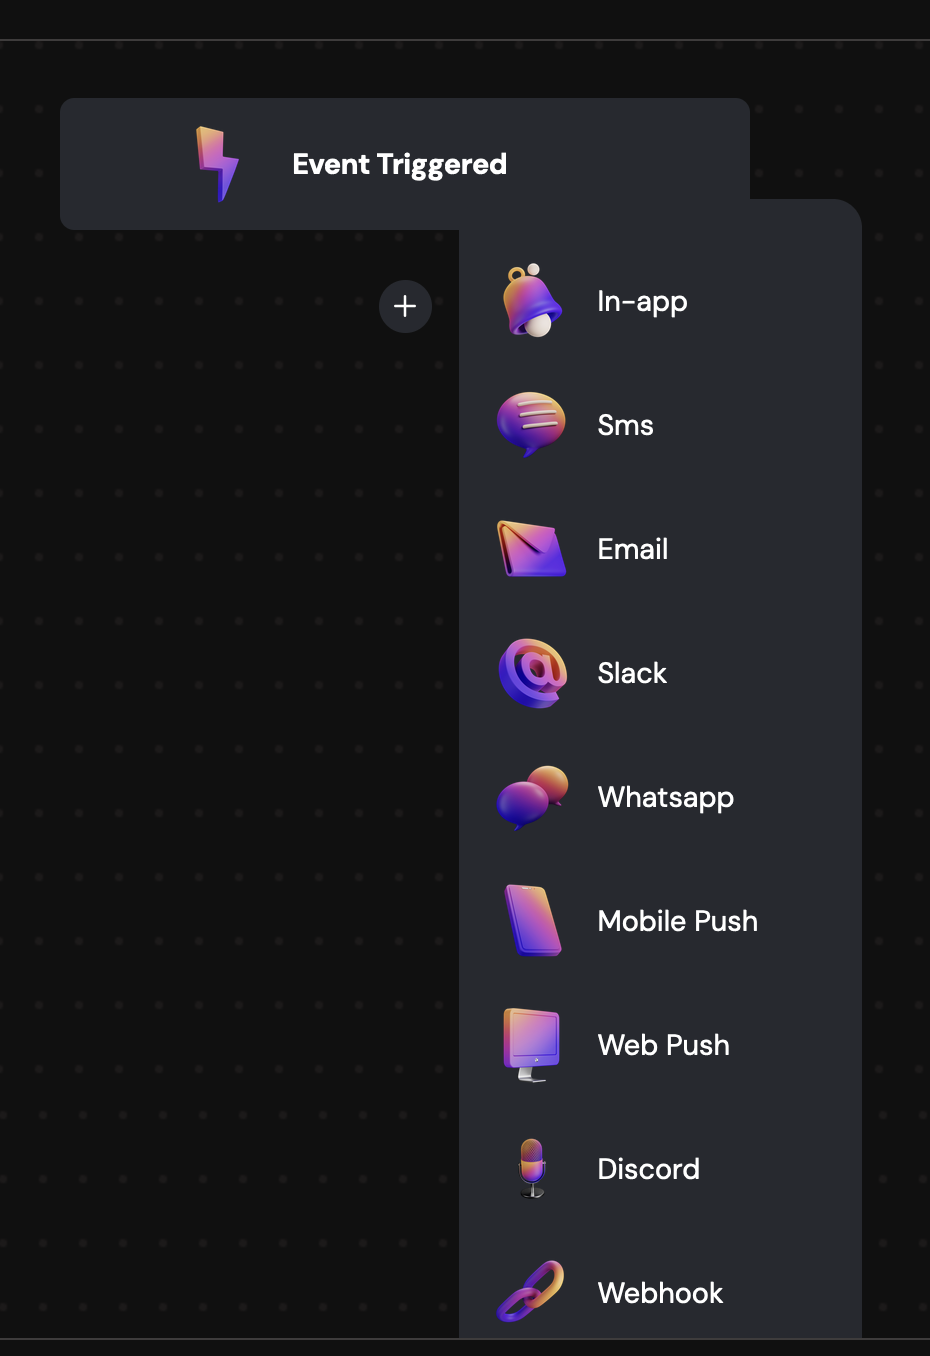
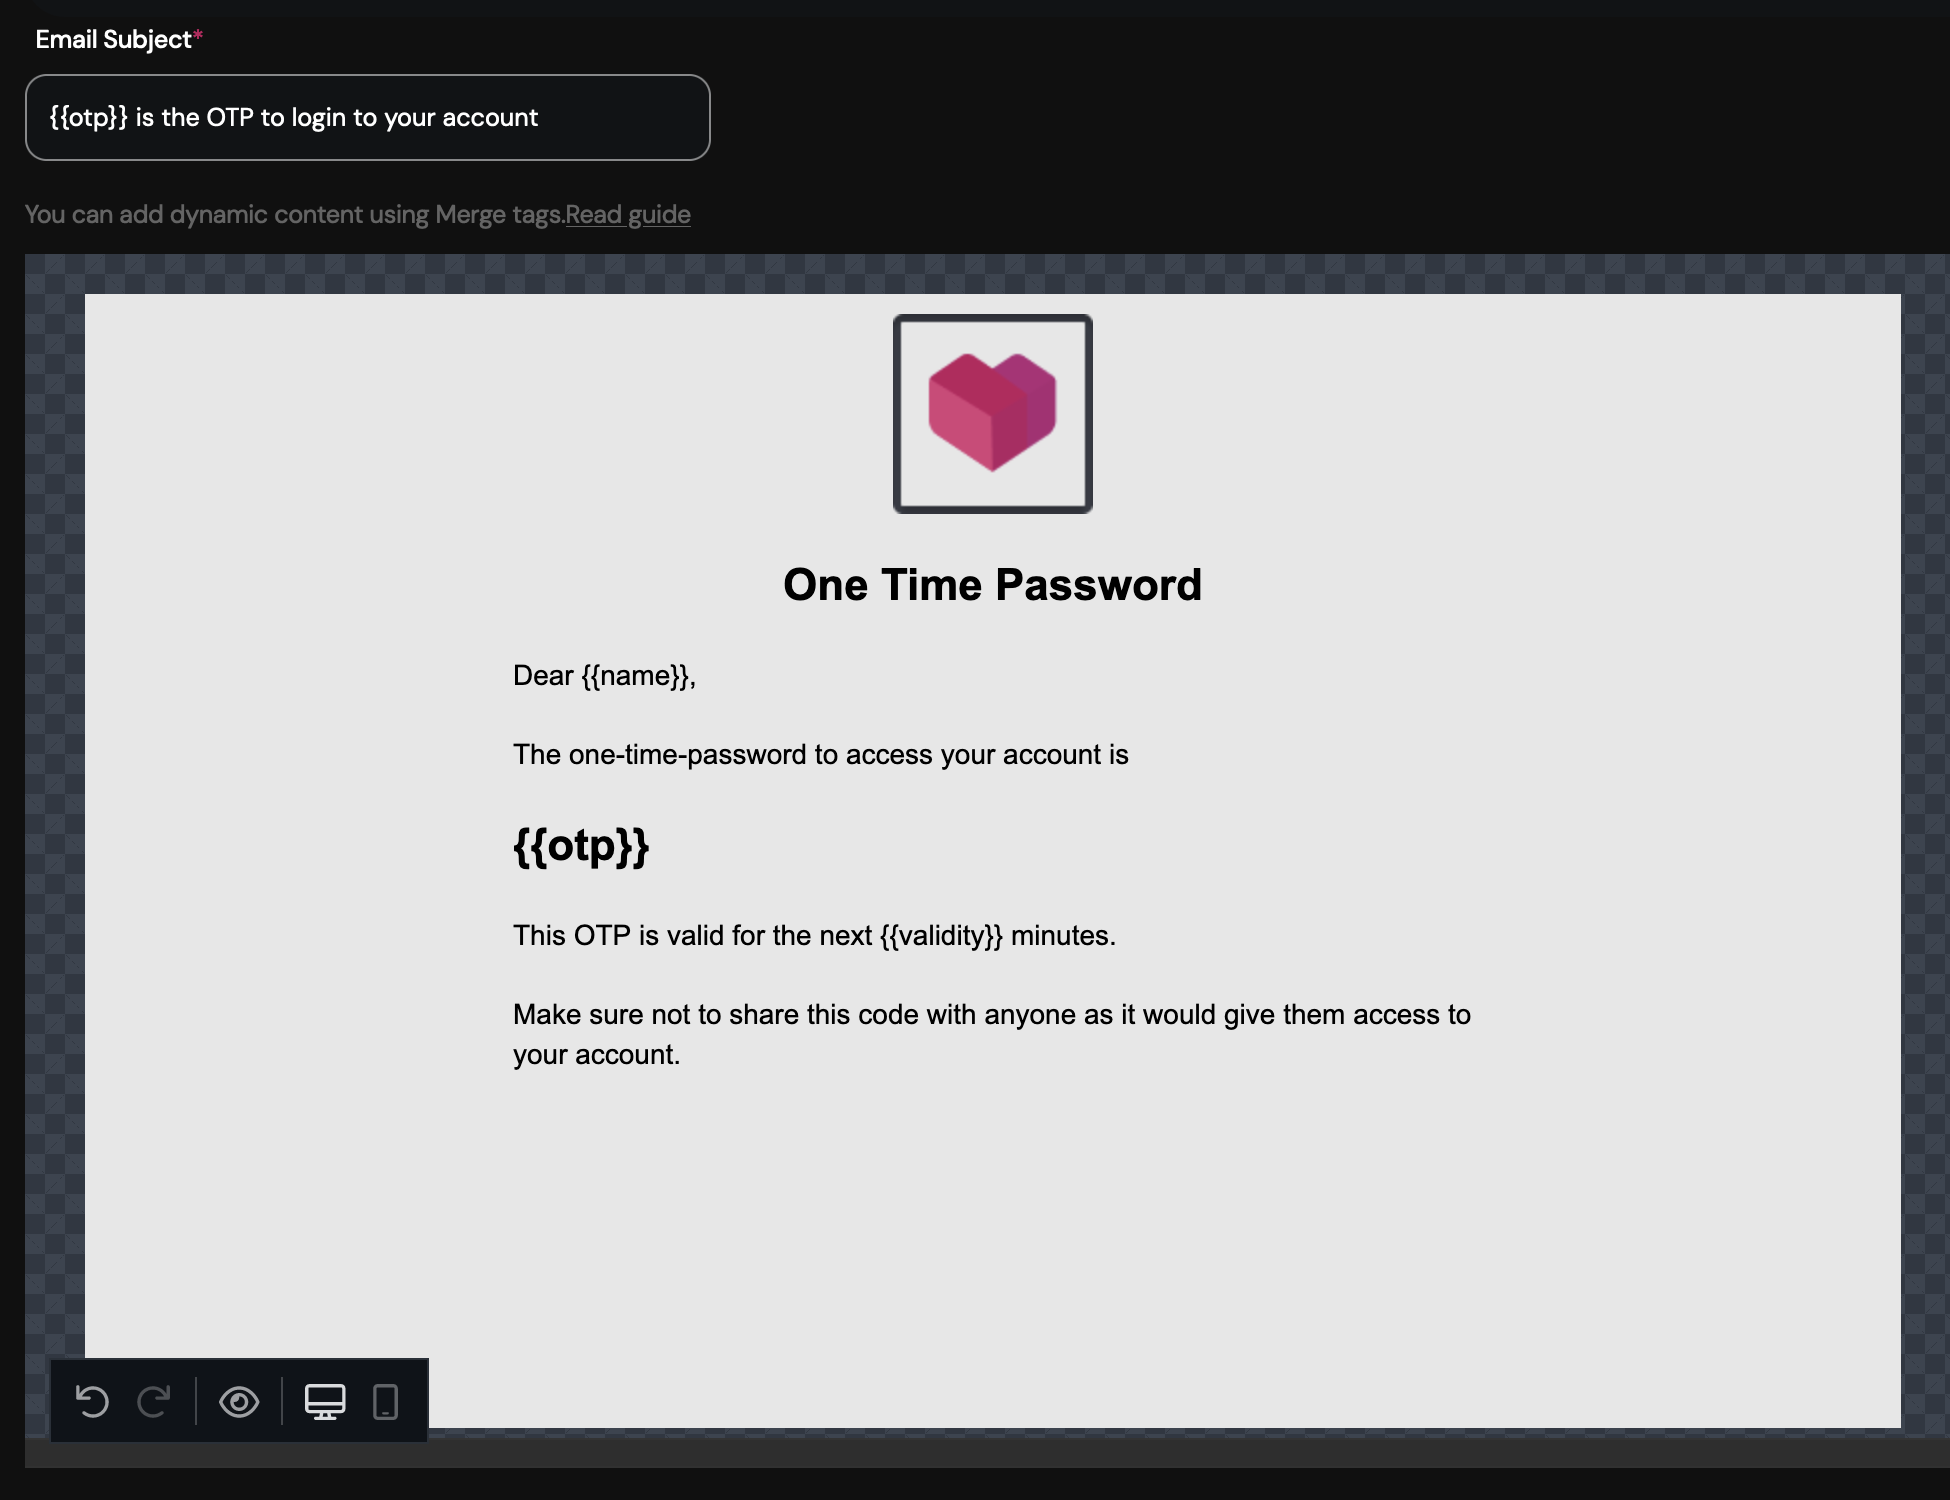
You can use the UI based notification editor to design notification.
Using placeholders in template
You can use variables in your template which can be replaced dynamically when you trigger a notification programatically using
our REST API or SDKs. You can supply the values for these variable placeholders through the data parameter
in the API or SDK.
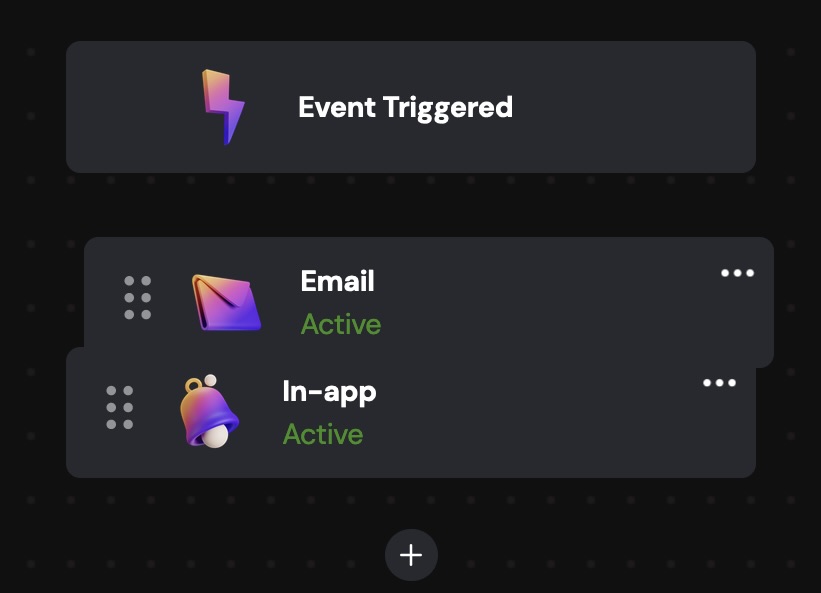
Customizing notification channel priorities in template
When you’ve added content to multiple channels in your template, you can specify the order in which notifications are delivered. For instance, if you have an Event Triggered card followed by an In-app card and then an Email card, the notifications will be sent in that sequence. However, you also have the flexibility to customize this order. Simply press and hold any card, then move it vertically to place it above or below another channel. This way, notifications will be sent according to your desired priority.
3. Triggering the notification via API
After creating the notification template, you can trigger it from your backend code using our Send Notification API or SDKs.
All you need is the Template ID which you can see on your dashboard.
- Node
- cURL
const { EngagespotClient } = require("@engagespot/node");
const client = EngagespotClient({
    apiKey: "YOUR_ENGAGESPOT_API_KEY",
    apiSecret: "YOUR_ENGAGESPOT_API_SECRET"
});

client.send({
    notification:{
        templateId:483561
    },
    data:{
        "otp":"58365",
        "validity":"5"
    }
    recipients:['<your-users-unique-identifier>']
});
curl --location --request POST 'https://api.engagespot.co/v3/notifications' \
--header 'X-ENGAGESPOT-API-KEY: YOUR_ENGAGESPOT_API_KEY' \
--header 'X-ENGAGESPOT-API-SECRET: YOUR_ENGAGESPOT_API_SECRET' \
--header 'Content-Type: application/json' \
--data-raw '{
    {
    "notification": {
        "templateId": 483561
    },
    "data":{
        "otp":"58365",
        "validity":"5"
    },
    "recipients": [
        "<your-users-unique-identifier>"
    ]
  }
}'