Slack Integration Guide
To integrate Slack with Engagespot for notifications, you'll need to store integration credentials within the user's profile. This allows specific channels to receive updates seamlessly.
Unique Identifier
Each provider is identified by a unique identifier. Unique identifier of Slack provider is slack.
Enabling Slack Provider
To enable Slack provider, login to your Engagespot Console, goto Channels -> Slack and enable Slack Provider.
Slack uses slack attribute in your user's profile as the primary address to deliver the notifications. So make sure your user's profile has the slack attribute set.
How set slack attribute in user's profile.
You can add slack attributes to your user's profile either via REST API or our front-end libraries (For example - ReactJS or Core Javascript).
From front-end library
Make sure you have authenticated the front-end library properly.
- Javascript Core
const engagespotClient = new Engagespot('API_KEY', {
  userId: '123e4567-e89b-12d3-a456-426614174000',
});

engagespotClient.setProfileAttributes({
  slack: {
    webhookUrl: 'your webhook token url',
  },
});
This will add slack attribute to your user's (123e4567-e89b-12d3-a456-426614174000) profile.
From backend library or REST API
You can use the PUT method on /users end point or PUT method of /profile endpoint in the REST API to update your user's profile.
Read API Docs for more information.
- Node
- cURL
import { EngagespotClient } from '@engagespot/node';

const client = EngagespotClient({
  apiKey: 'ENGAGESPOT_API_KEY',
  apiSecret: 'ENGAGESPOT_API_SECRET',
});

client.createOrUpdateUser('identifier', {
  slack: {
    webhookUrl: 'your webhook token url',
  },
});
curl --location --request PUT 'https://api.engagespot.co/v3/users/{identifier}' \
--header 'X-ENGAGESPOT-API-KEY: ENGAGESPOT_API_KEY' \
--header 'X-ENGAGESPOT-API-SECRET: ENGAGESPOT_API_SECRET' \
--header 'Content-Type: application/json' \
--data-raw '{
  "slack": {
    "webhookUrl": "your webhook token url"
  }
}'
Alternatively, you can use PATCH method on /profile endpoint which uses JSON Patch syntax to do complex operations on your Profile object.
Get Webhook Url
- Create a Slack app (if you don't have one already)
For creating a slack app you can follow https://api.slack.com/apps link and click
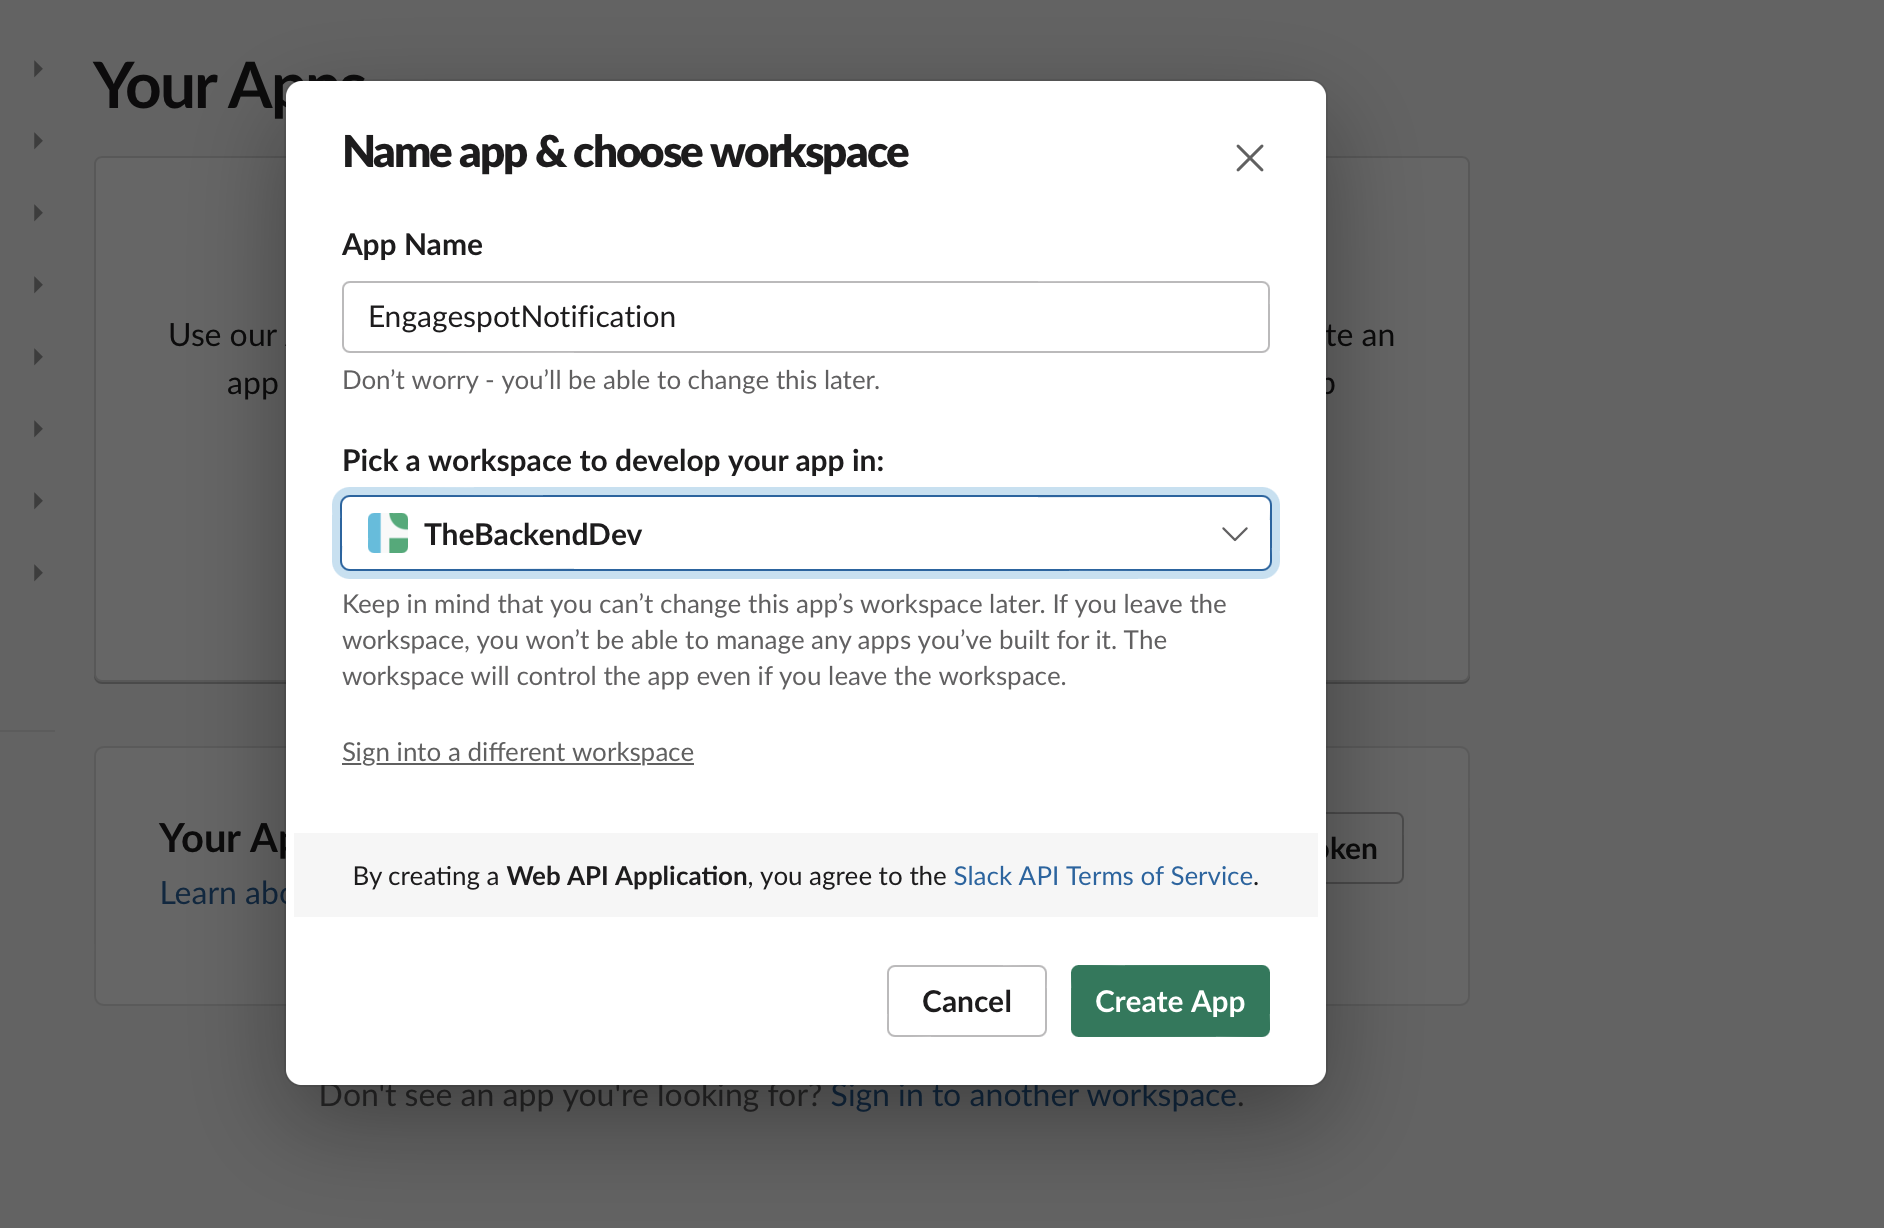
Create New App.
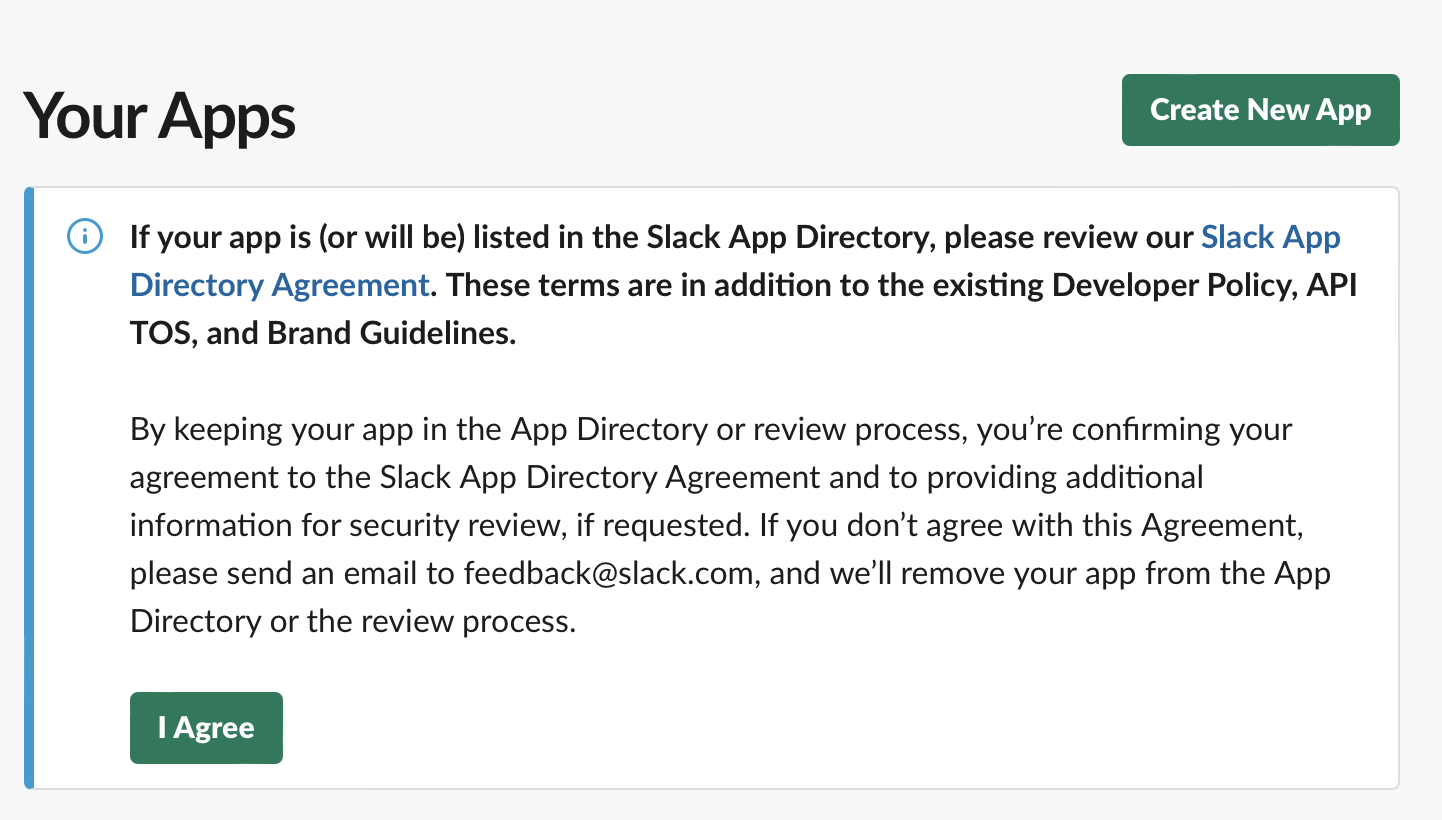
Pick a name, choose a workspace to associate your app with (bear in mind you'll probably be posting lots of test messages, so you may want to create a channel for sandbox use), then click Create App. If you've already created an app, you can use that one.
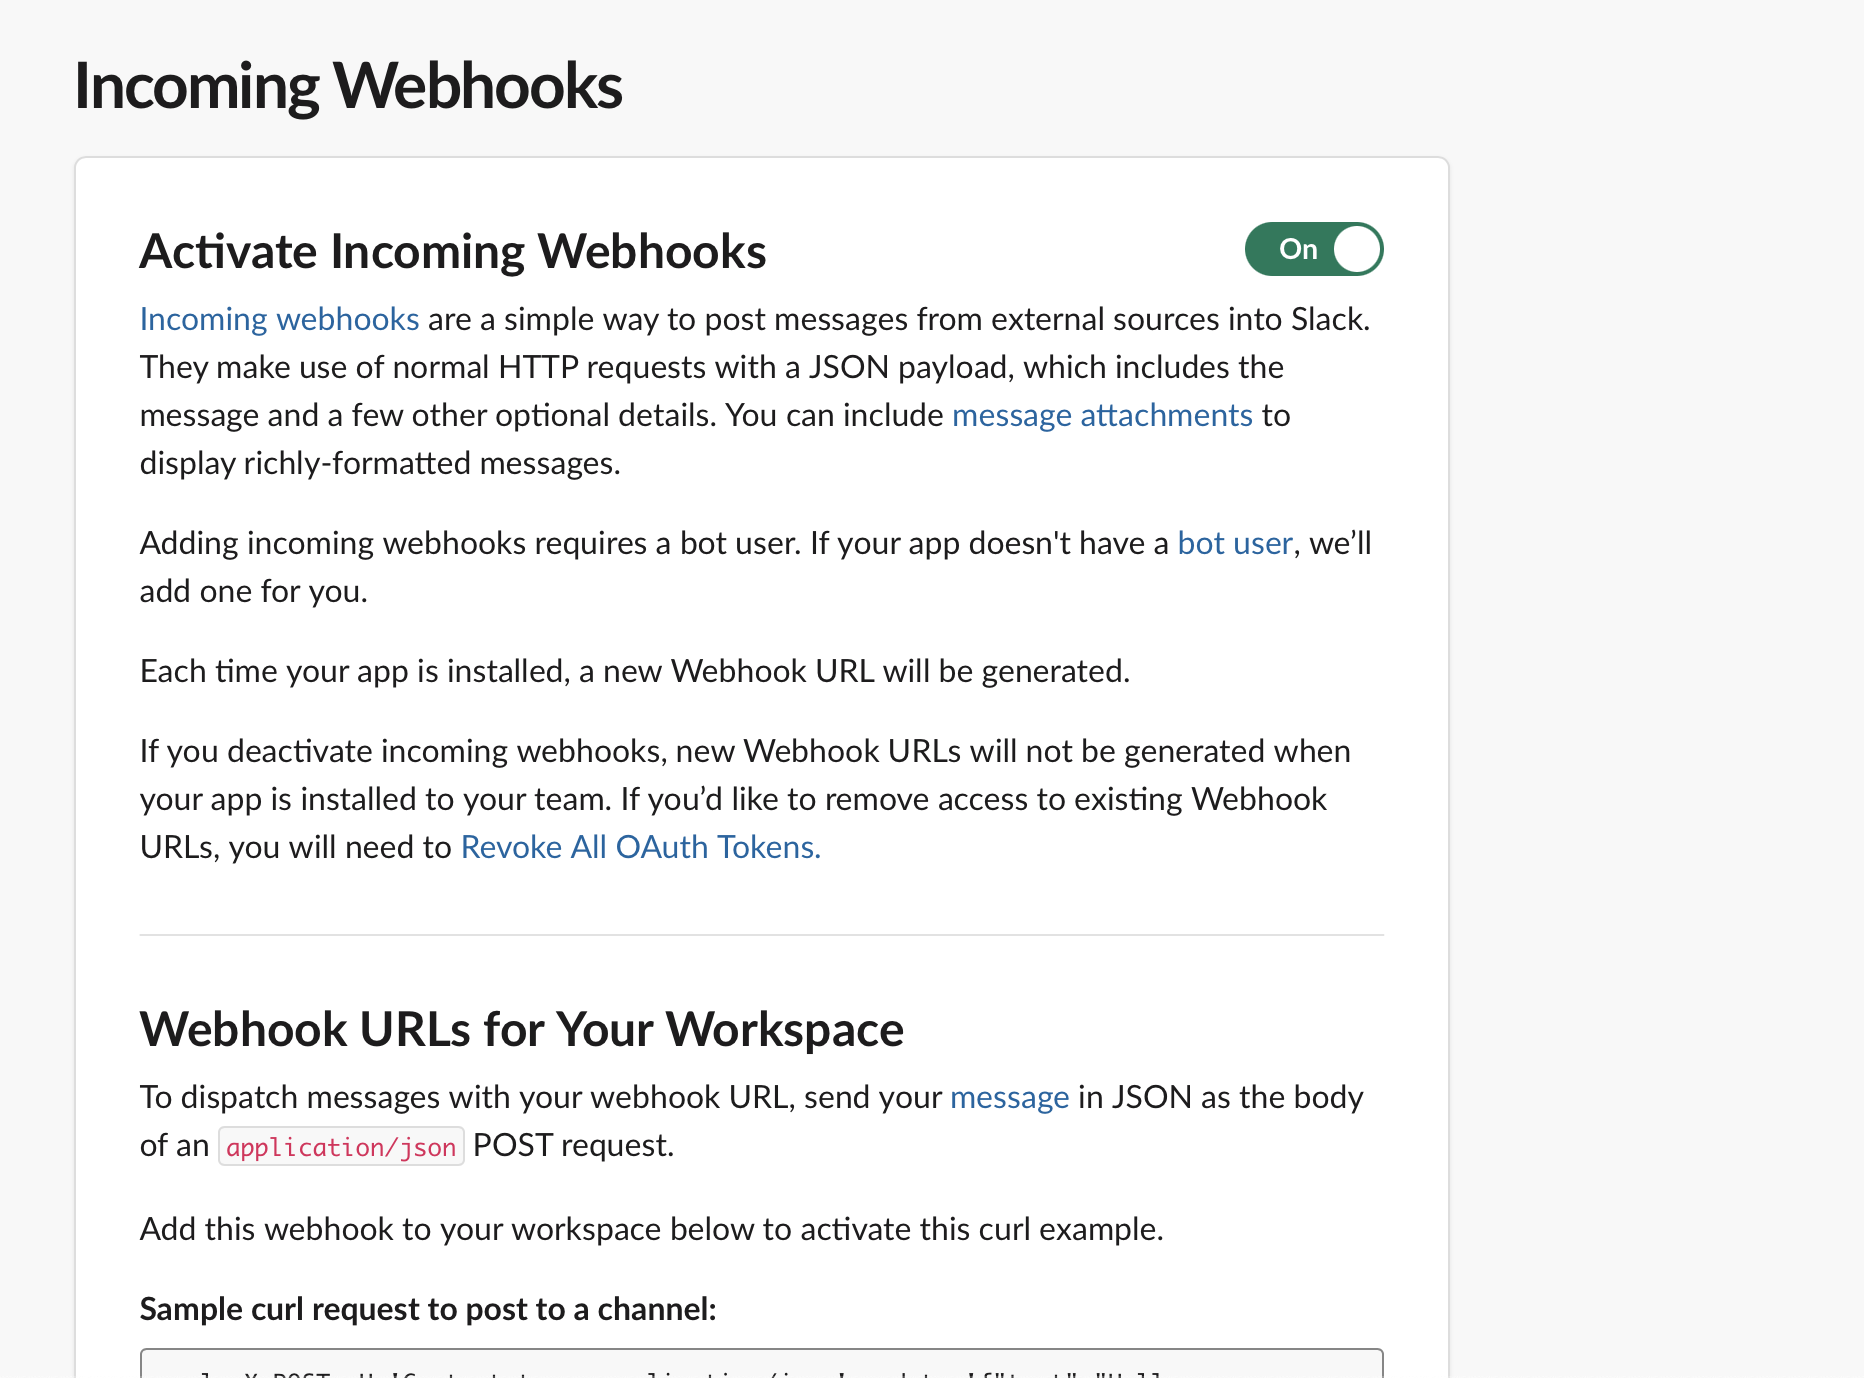
- Enable incoming webhooks
You'll be redirected to the settings page for your new app (if you're using an existing app, you can load its settings via your app's management dashboard).
From here, select Incoming Webhooks, and toggle Activate Incoming Webhooks to on.
- Create an incoming webhook
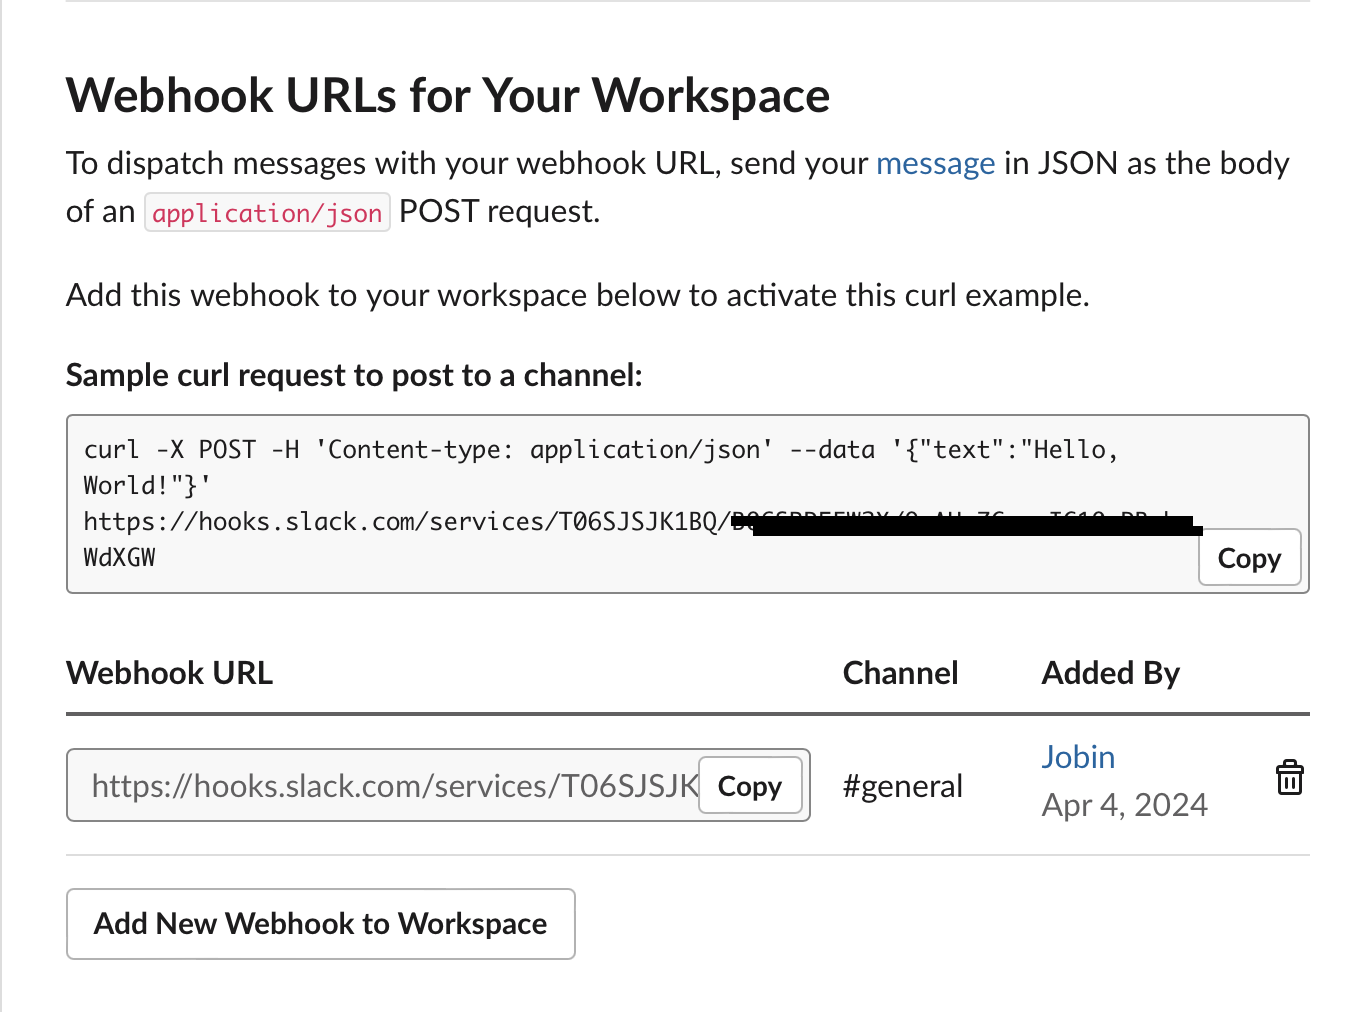
Now that incoming webhooks are enabled, the settings page should refresh and some additional options will appear. One of those options is a very helpful button called Add New Webhook to Workspace — click it!
What this button does is trigger a shortcut version of the installation flow for Slack apps, one that is completely self-contained so that you don't have to actually build any code to generate an incoming webhook URL.It will show how you can generate webhooks programmatically later.
Permissions screen with incoming webhooks channel selector
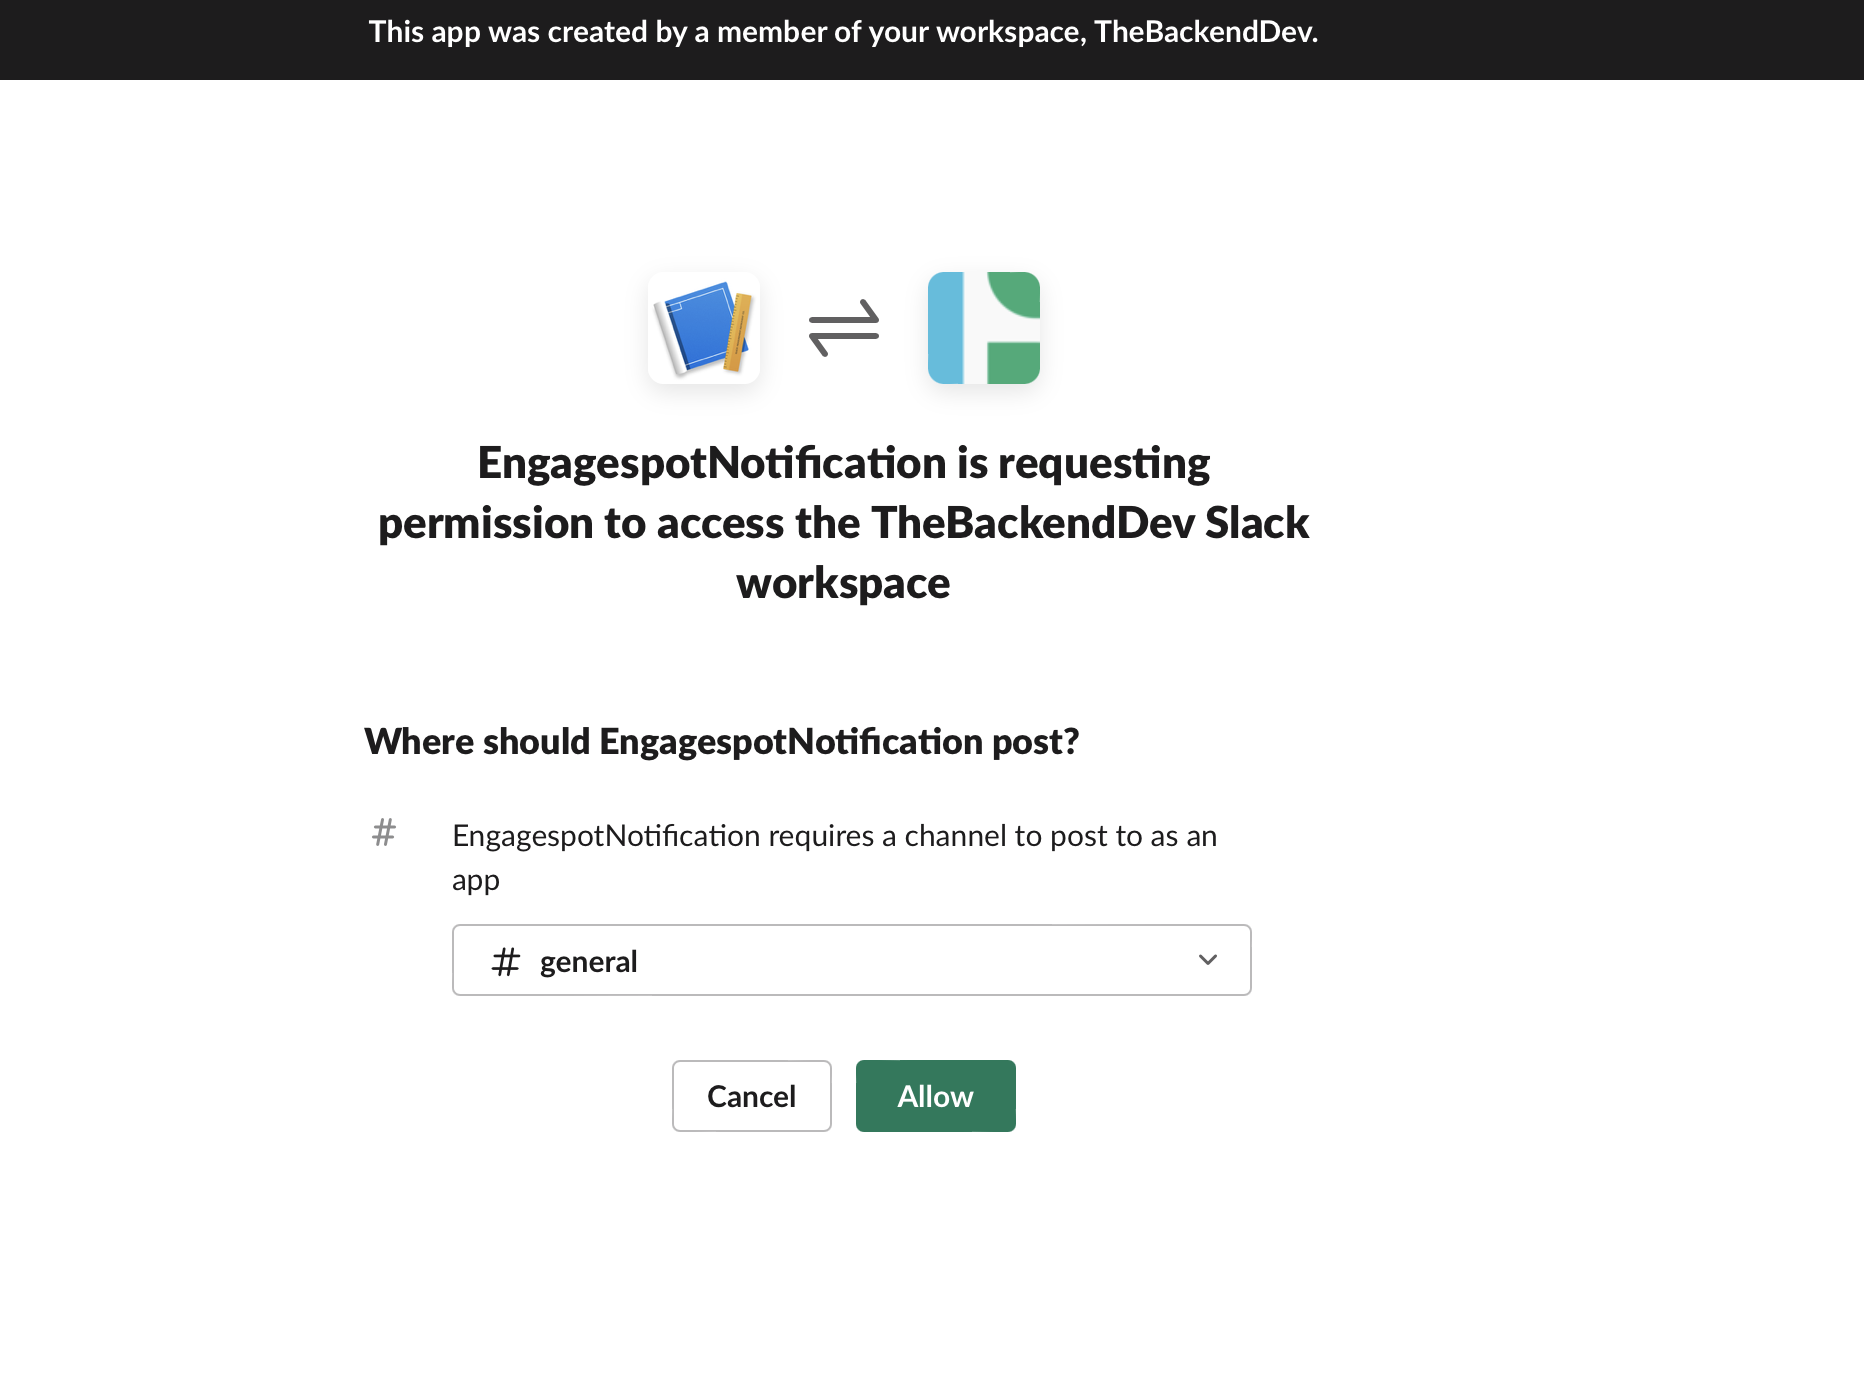
Go ahead and pick a channel that the app will post to, then select Authorize. If you need to add the incoming webhook to a private channel, you must first be in that channel.
You'll be sent back to your app settings, where you should see a new entry under the Webhook URLs for Your Workspace section. Your webhook URL will look something like this:
https://hooks.slack.com/services/T00000000/B00000000/XXXXXXXXXXXXXXXXXXXXXXXX
Now you can set this webhookurl to the slack attributes to your user's profile.