Sendgrid
Use your own Sendgrid email account to deliver notifications to your users via Engagespot. For this you need a Sendgrid account, and an API KEY from Sendgrid.
Unique Identifier
Each provider is identified by a unique identifier. Unique identifier of Sendgrid provider is sendgrid_email
Enabling Sendgrid Provider
To enable Sendgrid provider, login to your Engagespot Console, goto Channels -> Email and enable Sendgrid Provider.
Sendgrid email provider uses email attribute in your user's profile as the primary address to deliver the notifications. So make sure your user's profile has the email attribute set.
SMTP Provider Configurations.
Sendgrid Provider requires the following configurations.
| Configuration | Description | Required | Example |
|---|---|---|---|
| API_KEY | Your Sendgrid API Key | Yes | SG.ju725hFjsj9inbV44VctejKLe64lo8vc |
| FROM_NAME | Default from name | No | Anand |
| FROM_EMAIL | Default from email | No | me@example.com |
How we send email via Sendgrid?
There is no rocket science here. We simply use Sendgrid API to deliver your notifications. By default, if you donot override anything, we'll consider your notification.title as the email subject, a combination of your notification.title and notification.message as your email's body (Plain text), and if you have specified notification.url, we will add a default button to your email with Click Here label.
Overriding Configurations
Sendgrid provider allows you to override all the above configurations (and you can specify several more options) while sending a notification through Engagespot API, using the https://api.engagespot.co/v3/notifications endpoint.
To override the configurations, you must supply them via override.sendgrid_email parameter of the above API. Within the override parameter, you can supply any parameter that we'll directly pass to Sendgrid /v3/mail/send API See doc. This makes sure you can use the complete features of Sendgrid API while still using Engagespot to control your notifications!
For example, the below example shows how to send attachments using Sendgrid provier.
POST /notifications
{
  "notification": {
    "title": "Anand commented on your photo",
    "message": "Hey Steve, you're looking cool 😎. Who took this photo?",
    "url": "https://your-app.com/photos/17293739",
    "category": "comment"
  },
  "recipients": ["steve@example.com"],
  "override": {
    "sendgrid_email": {
      "_config": {
        "API_KEY": "SG.ju725hFjsj9inbV44VcGdtejKLe645JDkd99374gbh395cyhRg424Goloplo8vc"
      },
      "personalizations": [
        {
          "to": [
            {
              "name": "Vinu",
              "email": "vinu@example.com"
            }
          ],
          "dynamic_template_data": {
            "friend_name": "Jobin"
          }
        }
      ],
      "template_id": "t.18hfgcba64g464jck",
      "attachments": [
        {
          "content": "PCFET0NUWVBFIGh0bWw+CjxodG1sIGxhbmc9ImVuIj4KCiAgICA8aGVhZD4KICAgICAgICA8bWV0YSBjaGFyc2V0PSJVVEYtOCI+CiAgICAgICAgPG1ldGEgaHR0cC1lcXVpdj0iWC1VQS1Db21wYXRpYmxlIiBjb250ZW50PSJJRT1lZGdlIj4KICAgICAgICA8bWV0YSBuYW1lPSJ2aWV3cG9ydCIgY29udGVudD0id2lkdGg9ZGV2aWNlLXdpZHRoLCBpbml0aWFsLXNjYWxlPTEuMCI+CiAgICAgICAgPHRpdGxlPkRvY3VtZW50PC90aXRsZT4KICAgIDwvaGVhZD4KCiAgICA8Ym9keT4KCiAgICA8L2JvZHk+Cgo8L2h0bWw+Cg==",
          "filename": "index.html",
          "type": "text/html",
          "disposition": "attachment"
        }
      ]
    }
  }
}
Within the override object of a provider, there is a _config property where you can override the default configurations defined in Engagespot Console for that provider. This property will be removed before merging the override object with Sendgrid's send API.
Setup delivery tracking
To set up delivery tracking for the Sendgrid provider is really simple,
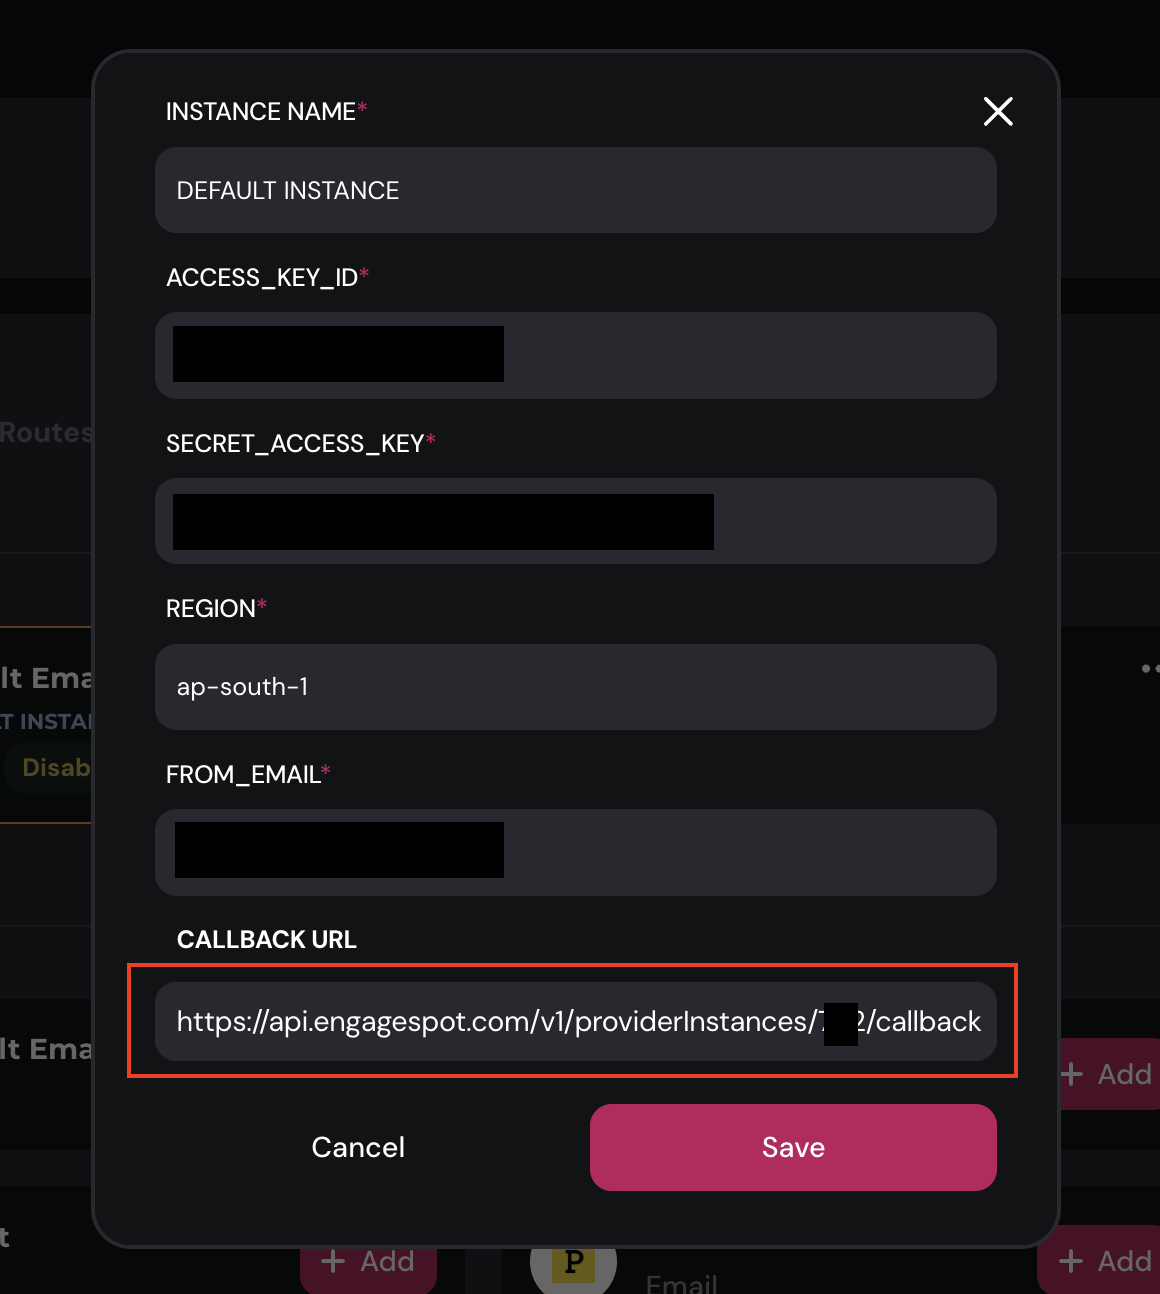
First off, you’ll need the URL from the system from which you want to receive the events. for that got to Engagespot Console -> Channels -> Email -> Configured Providers -> Sendgrid Instance -> Edit You can see the callback URL like this. Just copy this callback URL.
After Copying callback URL ,you can add an Event Webhook in the SendGrid application user interface (UI).
To add a new Event Webhook to your account using the SendGrid UI, follow the steps below.
- In the Twilio SendGrid application UI, navigate to Settings > Mail Settings.
- Under Webhook Settings, click Event Webhooks.
- The Event Webhook settings page will load. Click Create new webhook.
- A dialog will open where you can configure the Event Webhook. See the next section of this page to understand and configure each form field.
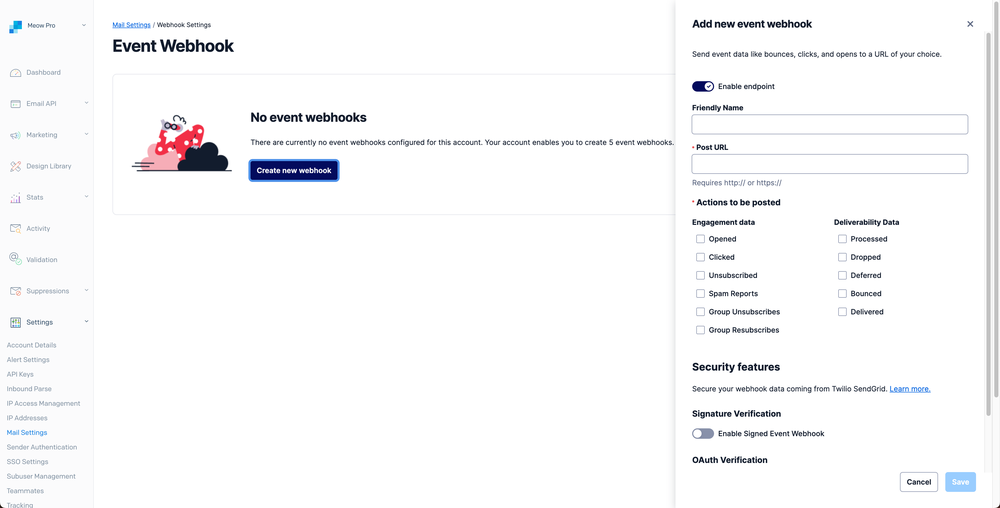
To configure your Event Webhook, populate the form fields described below. Only the Post URL and Actions to be posted fields are required.
Click Save to save the Event Webhook configuration.