Amazon SES
You can send email notifications through your AWS SES service.
Unique Identifier
Each provider is identified by a unique identifier. Unique identifier of Amazon SES provider is ses
Enabling AWS SES
To enable AWS SES provider, login to your Engagespot Console, goto Channels -> Email and enable AES SES Provider.
AWS SES provider uses email attribute in your user's profile as the primary address to deliver the notifications. So make sure your user's profile has the email attribute set.
Create an AWS SES API Key and Secret using your AWS IAM Service
To connect your AWS SES service with Engagespot, you must create an IAM user with SendEmail permission.
-
After logging into your AWS Console, search for the
IAMservice.
-
Then, on the sidebar, navigate to Access Management -> Users, and click Add Users

-
Set a username, and credential type to Access Key - Programmatic Access

-
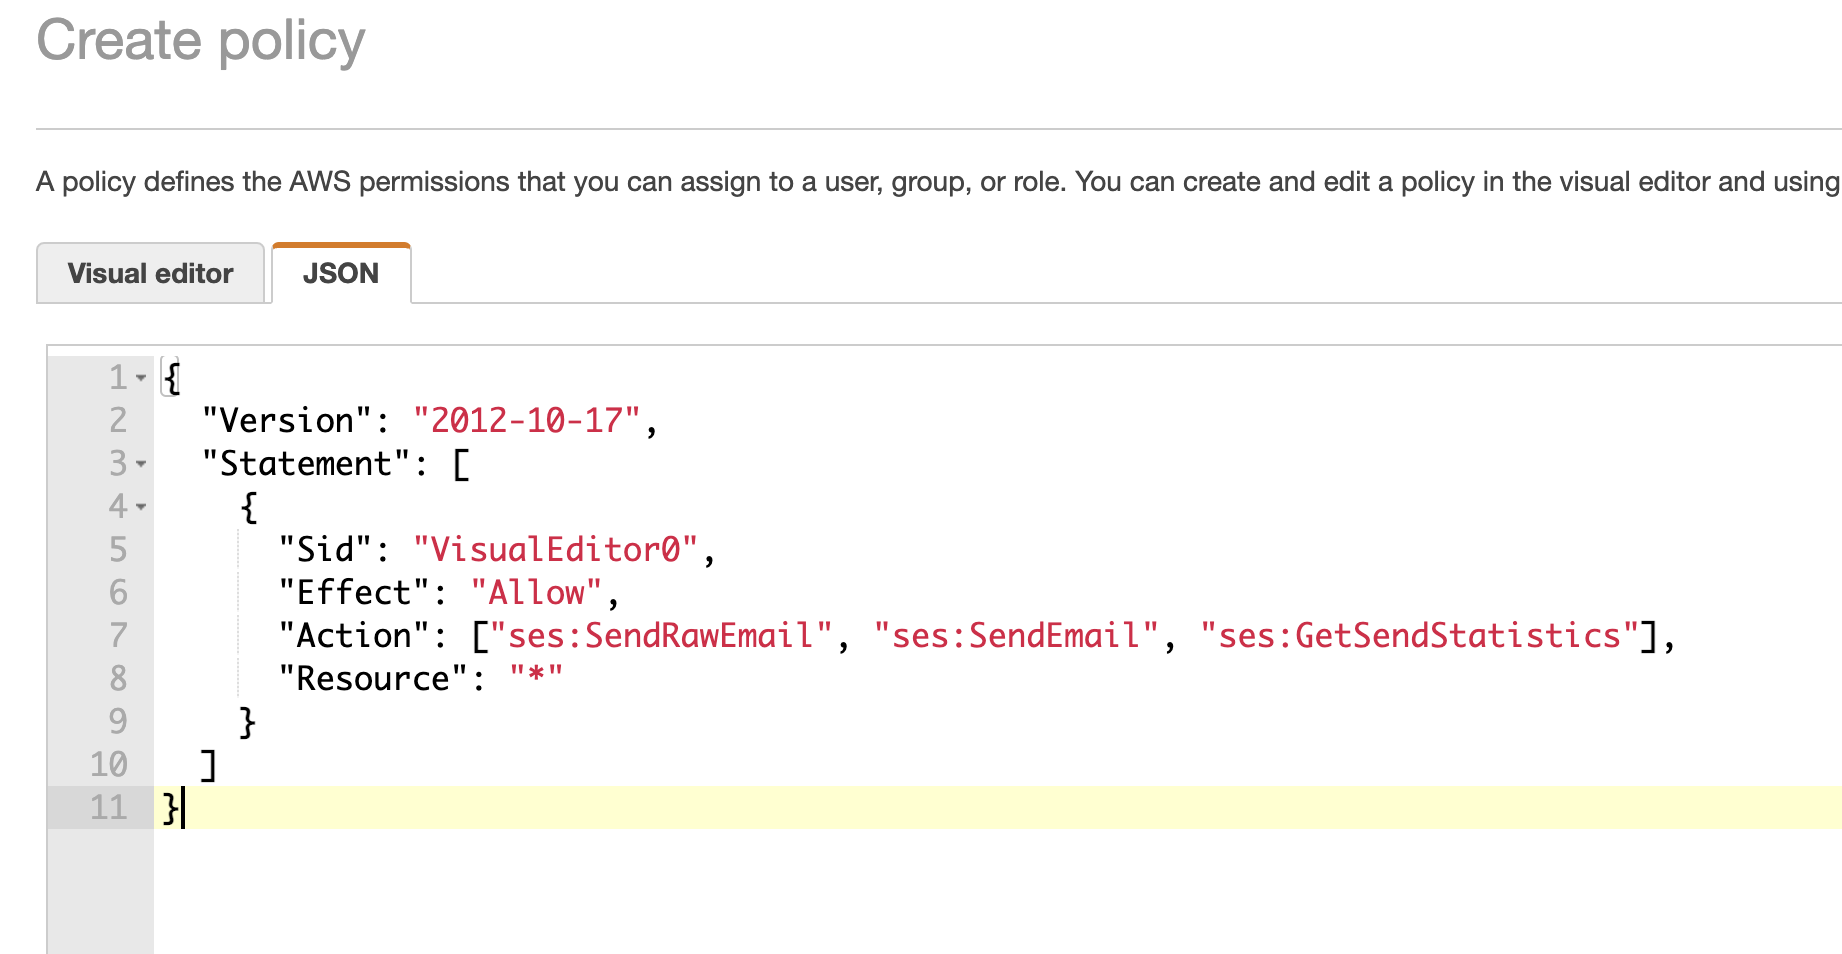
In the next step (Permissions), select Attach Existing Policies Directly, and click Create Policy

-
In the create policy dialog, select "JSON" tab, and paste the following policy. After that, click on the Next:Tags button at the bottom, then Next:Review button, and specify a name for your policy and finally click Create policy button.
{
  "Version": "2012-10-17",
  "Statement": [
    {
      "Sid": "VisualEditor0",
      "Effect": "Allow",
      "Action": ["ses:SendRawEmail", "ses:SendEmail", "ses:GetSendStatistics"],
      "Resource": "*"
    }
  ]
}
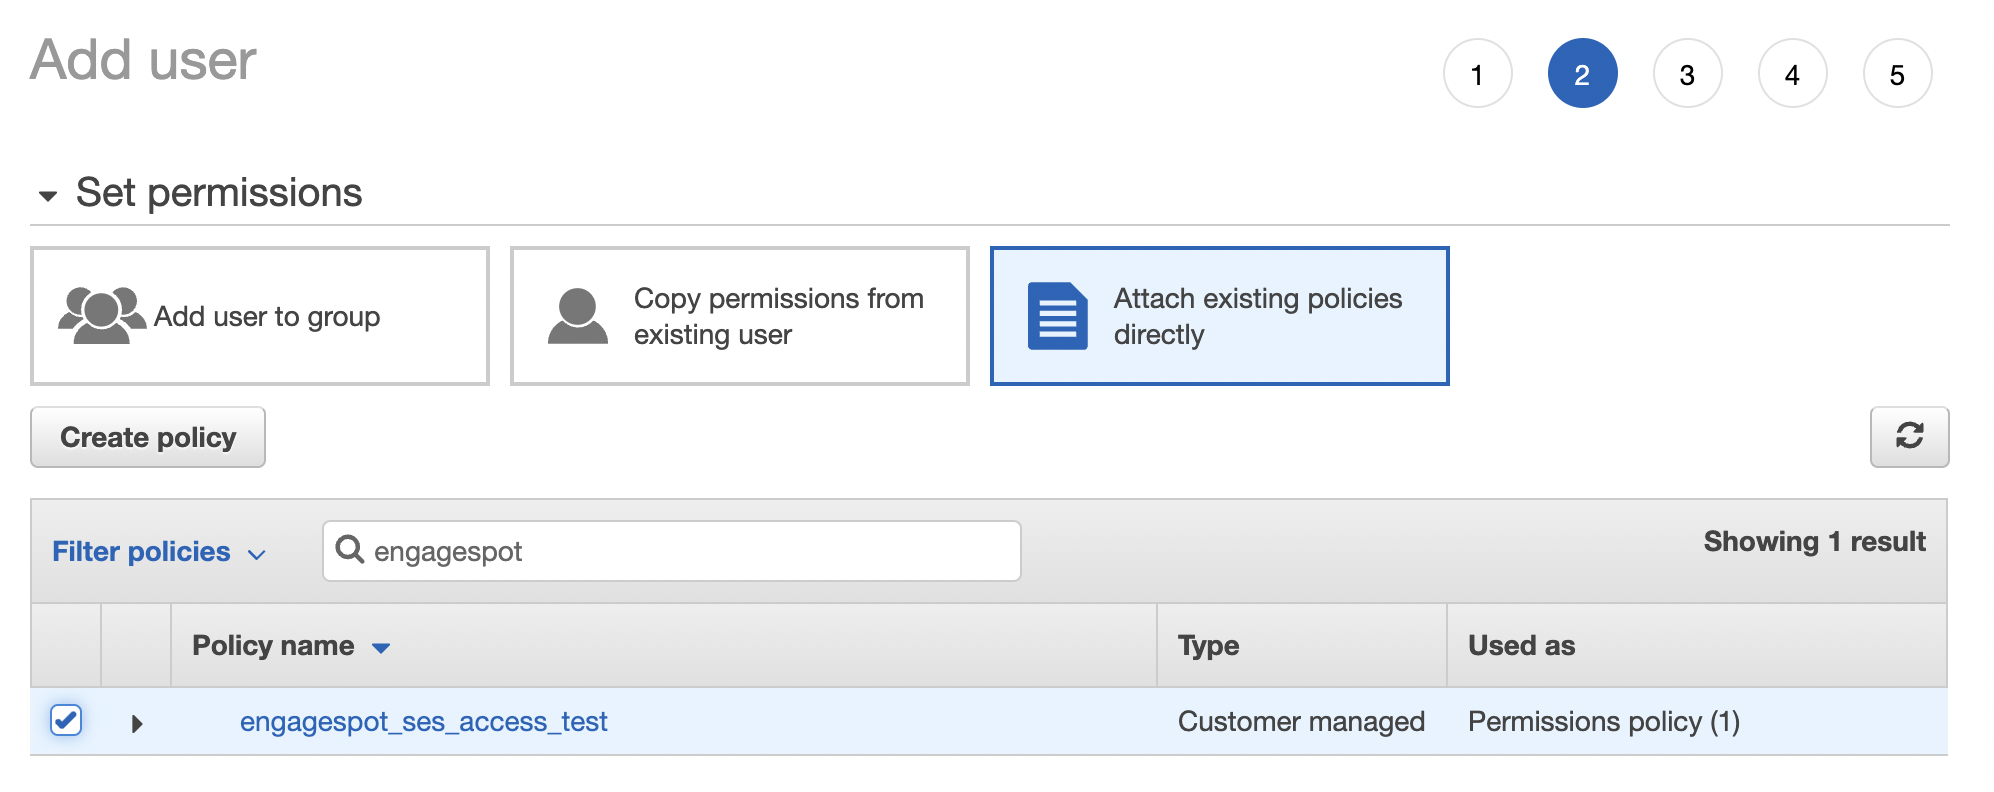
- After creating the policy, go back to the previous tab (Add User -> Set Permissions), and choose the policy you've just created. After that, click on the Next:Tags button at the bottom, then Next:Review button and finally Create user button.
-
Note the AWS Access Key ID and Secret Access Key

-
Now, goto your Engagespot Console -> Channels -> Email -> AWS SES.
-
Add the Access Key ID, Secret, Region and From Email. (Region where you created your AWS SES service, for example
us-east)
The FROM_EMAIL should be created as a Verified Identity in your SES account.
Also, by default your AWS SES account will be in sandbox mode which means you can send emails only to verified identities.To enable production access, you must send a request to AWS. Read more details here
AWS SES Configurations.
AWS SES requires the following configurations.
| Configuration | Description | Required | Example |
|---|---|---|---|
| ACCESS_KEY_ID | AWS IAM Access Key ID | Yes | |
| SECRET_ACCESS_KEY | AWS IAM Secret Access Key | Yes | |
| REGION | Your AWS SES Region | Yes | us-west-2 |
| FROM_EMAIL | Verified From Email identity on your SES account | Yes |
Overriding Configurations
SES provider allows you to override all the above configurations (and you can specify several more options) while sending a notification through Engagespot API, using the https://api.engagespot.co/v3/notifications endpoint.
To override the configurations, you must supply them via override -> ses parameter of the above API. Configurations override values should be passed via _config object, and you can override subject, text, html and from_name
For example,
{
  "notification": {
    "title": "Anand commented on your photo",
    "message": "Hey Steve, you're looking cool 😎. Who took this photo?",
    "url": "https://your-app.com/photos/17293739",
    "category": "comment"
  },
  "recipients": ["steve@example.com"],
  "override": {
    "ses": {
      "_config": {
        "ACCESS_KEY_ID": "ANNHYAAJMLCPWRWGCNBSKHFY",
        "SECRET_ACCESS_KEY": "nxxkjjuUtgVvcHjKpOJfdERFCJklytVbnkkksjshsgHHhsn",
        "REGION": "us-west-2",
        "FROM_EMAIL": "from@yourverifieddomain.com"
      },
      "from_name": "From Name",
      "subject": "Custom email subject",
      "text": "Email body plaintext",
      "html": "Email body with <h1>HTML</h1> support"
    }
  }
}
Setup delivery tracking
To set up delivery tracking for the SES provider, you can use AWS SNS to subscribe to SES events and then configure our Webhook Callback feature to inform Engagespot about the delivery events. This involves three steps.
- Enabling feedback notification in AWS SES
- Creating a Lambda function to transform SNS HTTPS Webhook to JSON format.
- Creating subscription for the SNS Topic
1. Enabling feedback notification in AWS SES
Goto your AWS Console, choose the verified identify that you have configured in Engagespot, navigate to the Notifications tab
and enable Feedback forwarding.
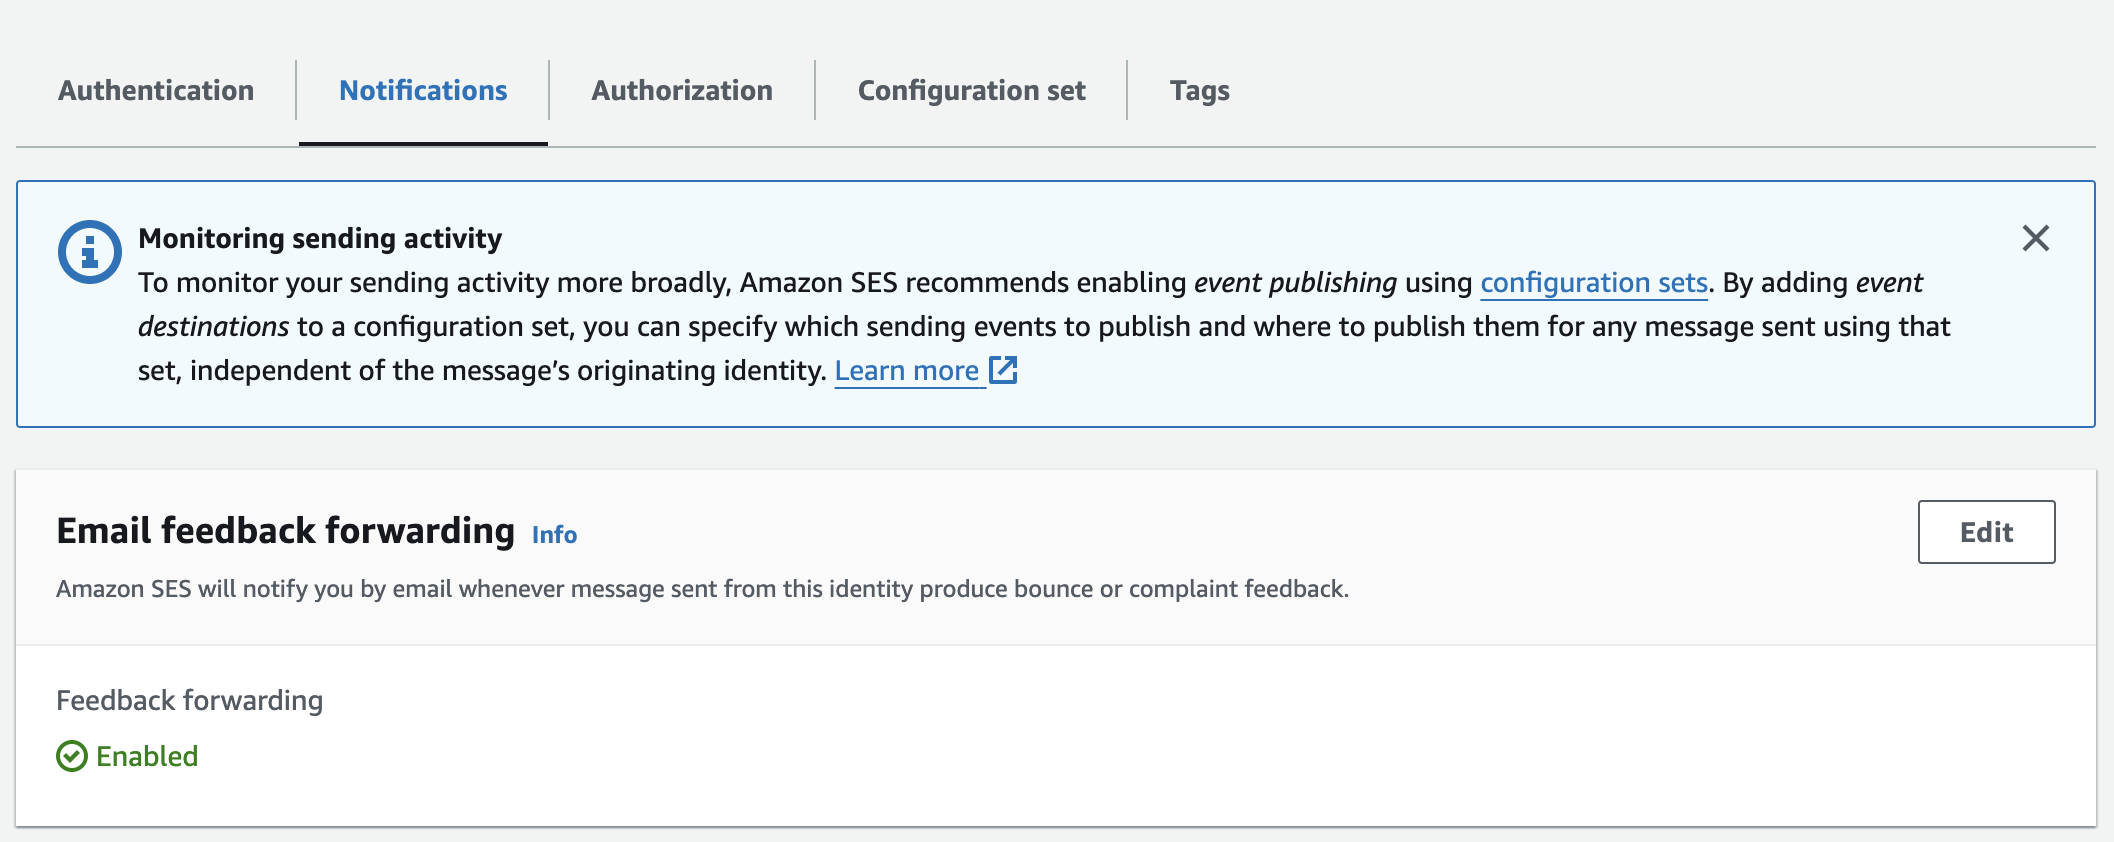
Then click the Edit button on the Feedback notifications section.
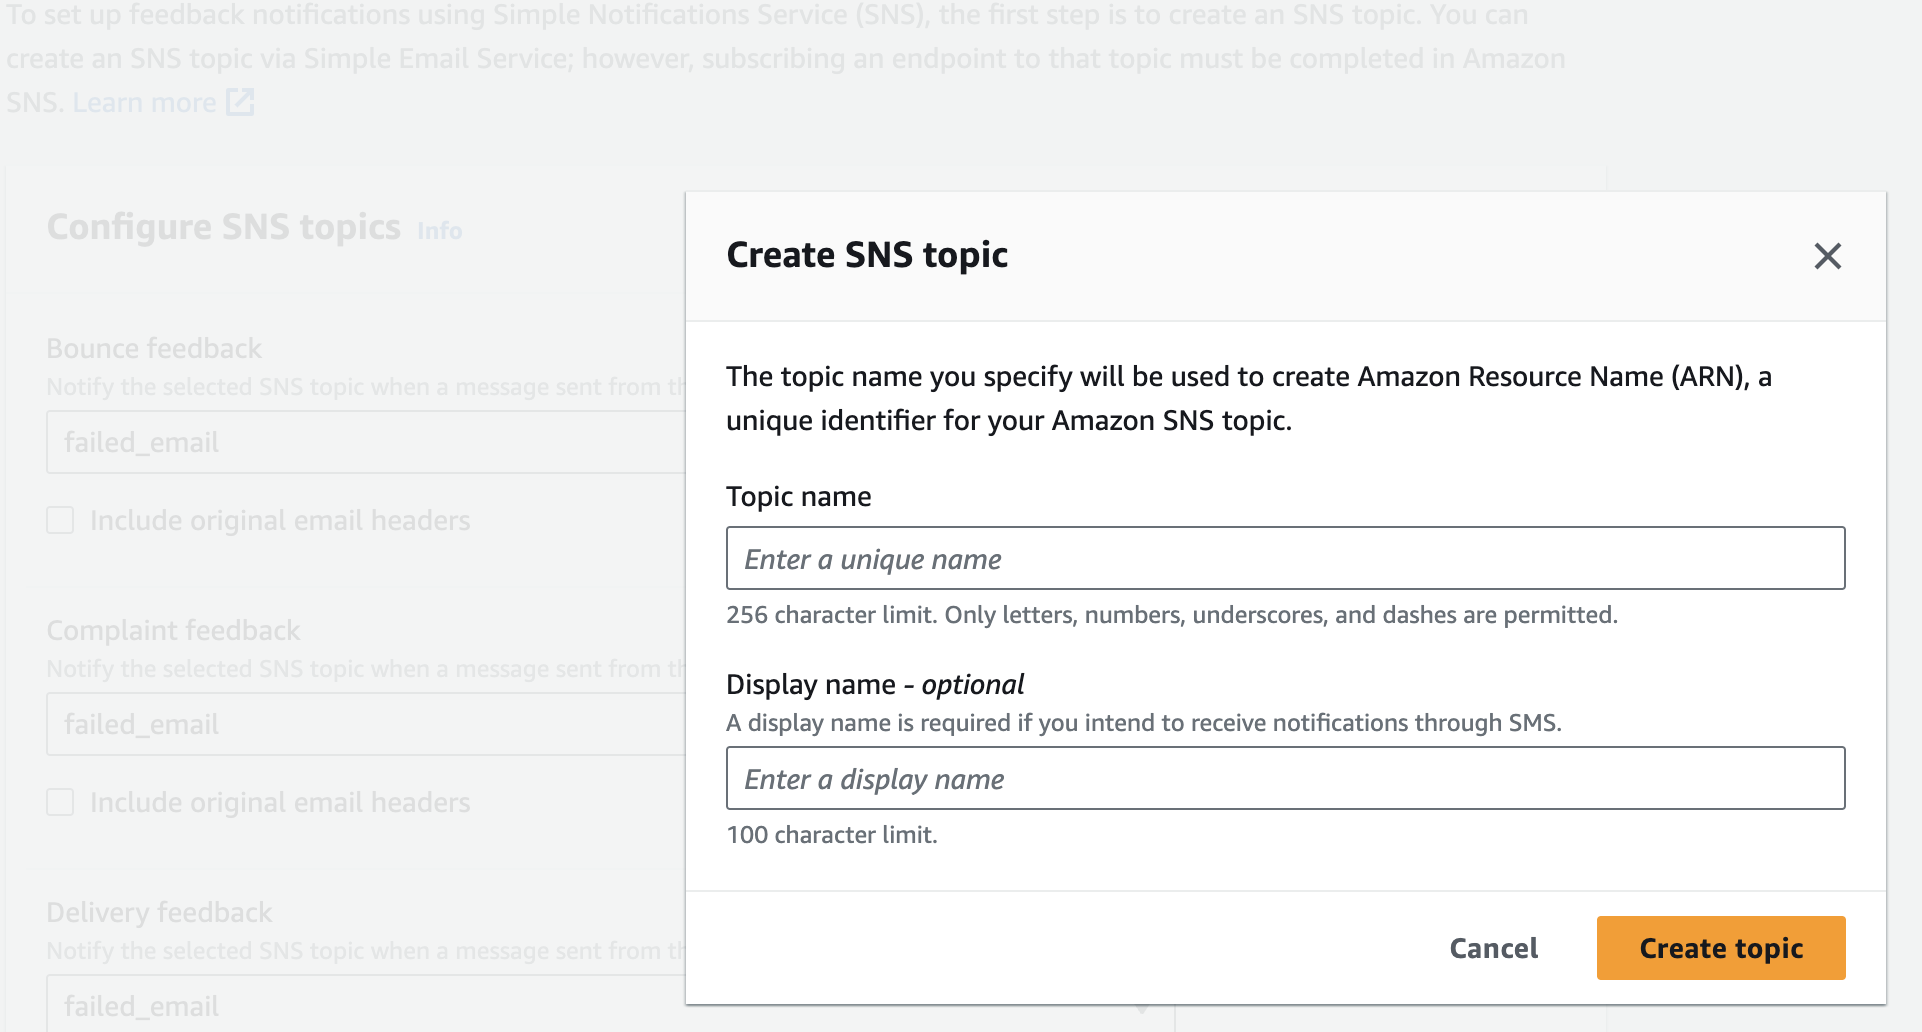
Here you should create an SNS topic. Let's say engagespot_ses_sns and assign it to Bounce feedback, Complaint feedback and Delivery feedback
2. Creating a Lambda Function
As the next step, we need to create a Lambda Function in AWS. Open your AWS Console, goto Lambda Functions, and Create a new function.
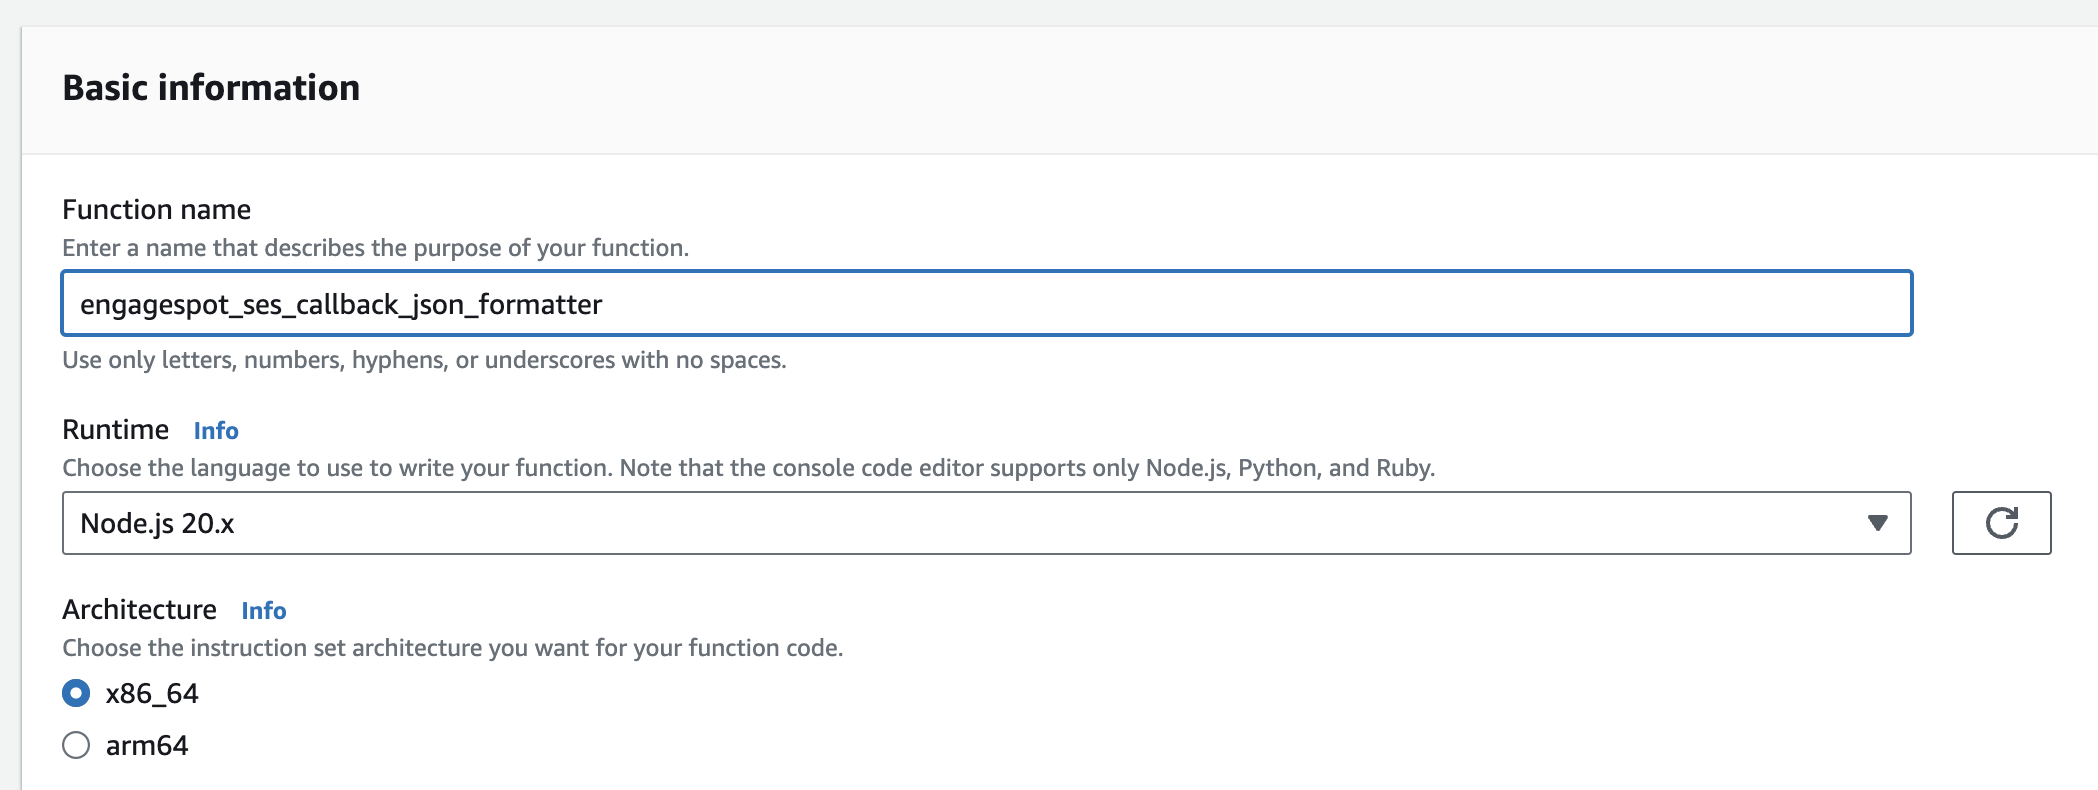
Edit the code of the lambda function, and paste the following code.
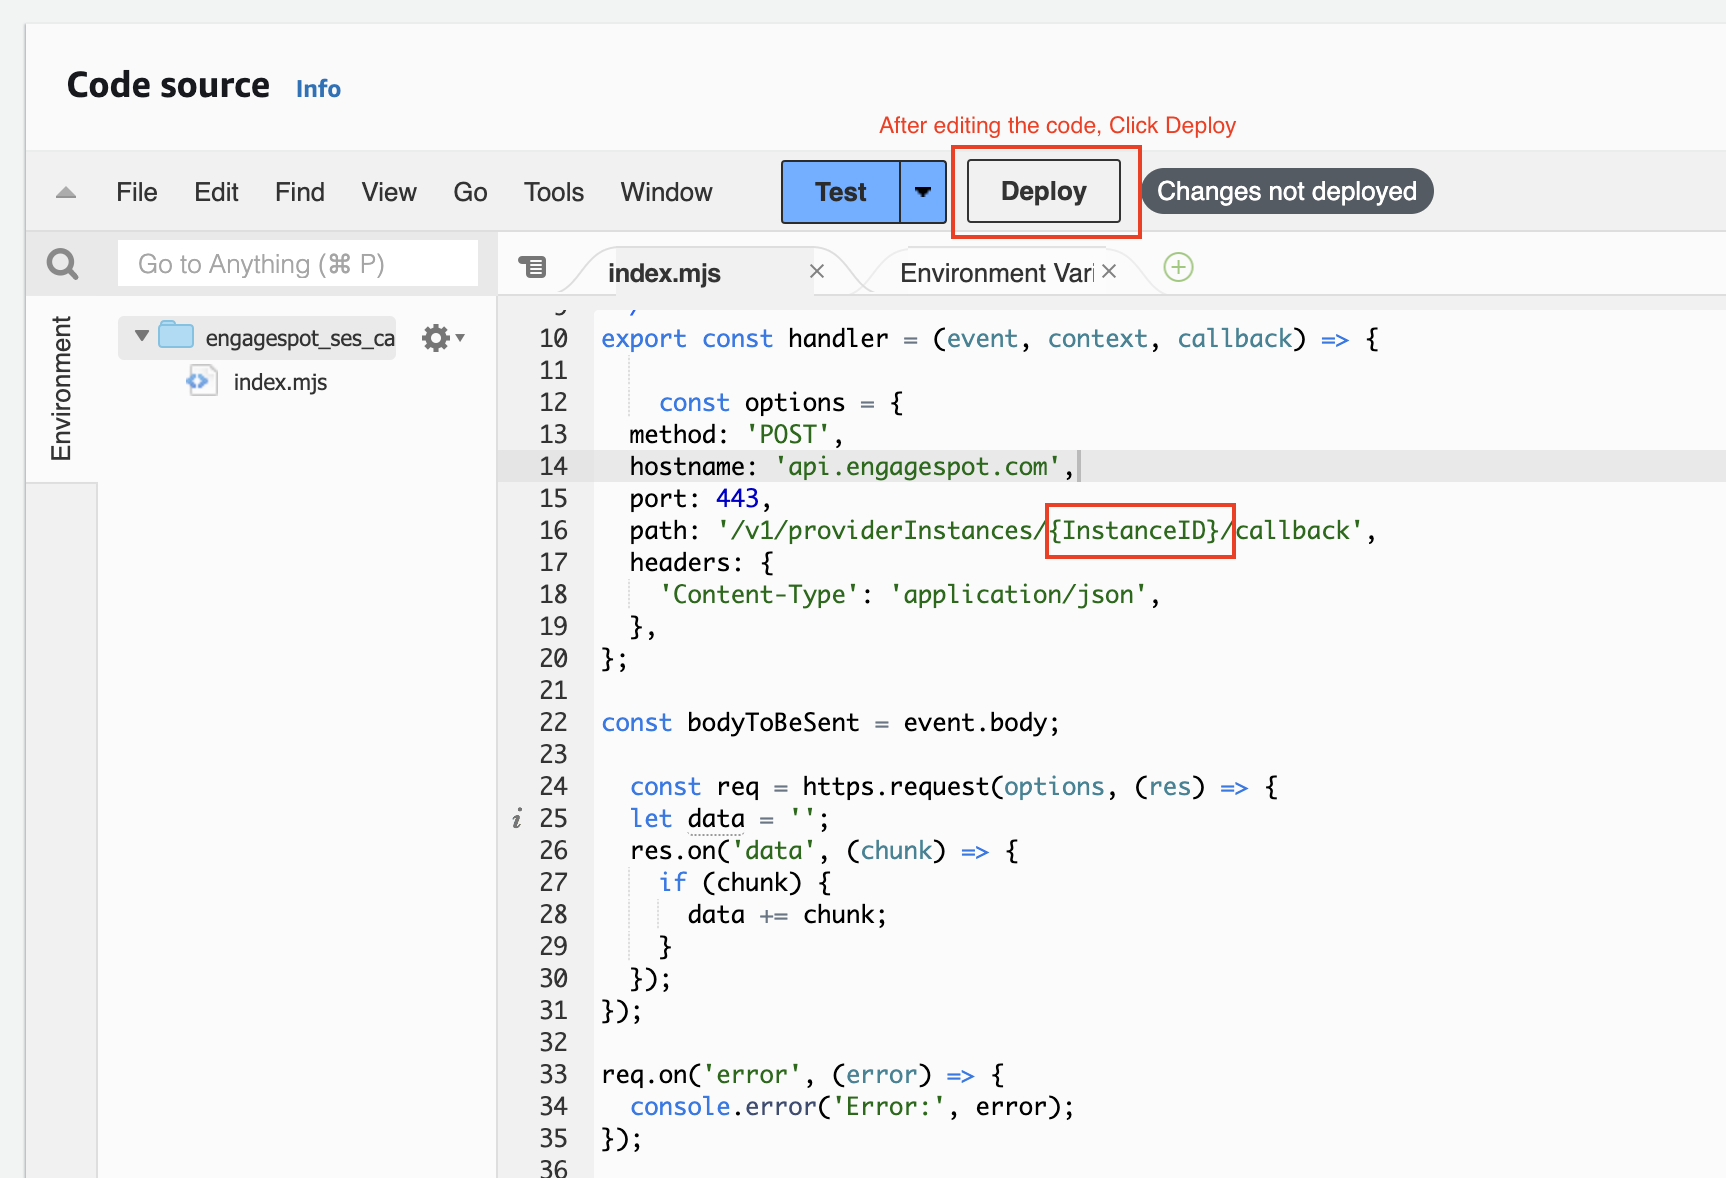
import * as https from 'node:https';

export const handler = (event, context, callback) => {
  const options = {
    method: 'POST',
    hostname: 'api.engagespot.com',
    port: 443,
    path: '/v1/providerInstances/{YourInstanceID}/callback',
    headers: {
      'Content-Type': 'application/json',
    },
  };

  const bodyToBeSent = event.body;

  const req = https.request(options, res => {
    let data = '';

    res.on('data', chunk => {
      if (chunk) {
        data += chunk;
      }
    });
  });

  req.write(bodyToBeSent);
  req.end();
};
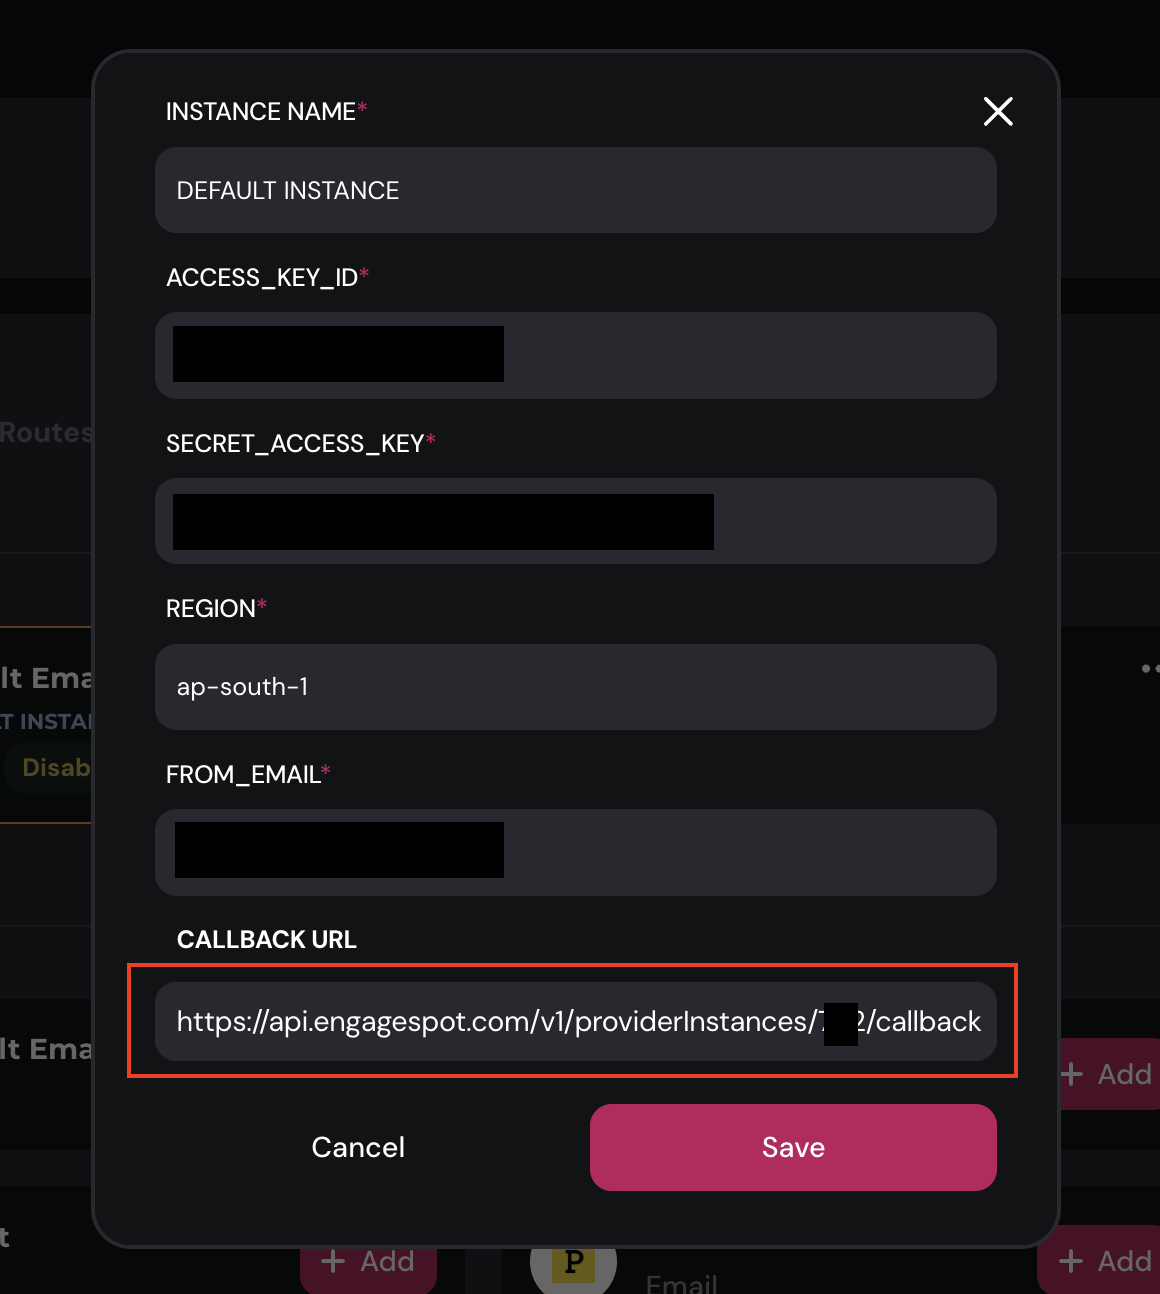
Make sure to replace the instance ID with your SES provider instance ID that you can find from your Engagespot Console -> Channels -> Email -> Configured Providers -> SES Instance -> Edit You can see the callback URL like this. Just make a note of the instance ID.
After making changes to the code, click "Deploy" button.
As the next step, you should create a URL for this function. Goto Configuration tab of the Lambda function -> Create Function URL -> Choose Auth Type as NONE -> click Save button.
Now you will see a function URL like https://u7ft734gi6hzfoafv4dgqhddy0xxpi.lambda-url.ap-south-1.on.aws/. Copy that.
3. Creating subscription for the SNS Topic
Goto AWS SNS -> Topics and choose the topic that you just created. (Eg: engagespot_ses_sns)
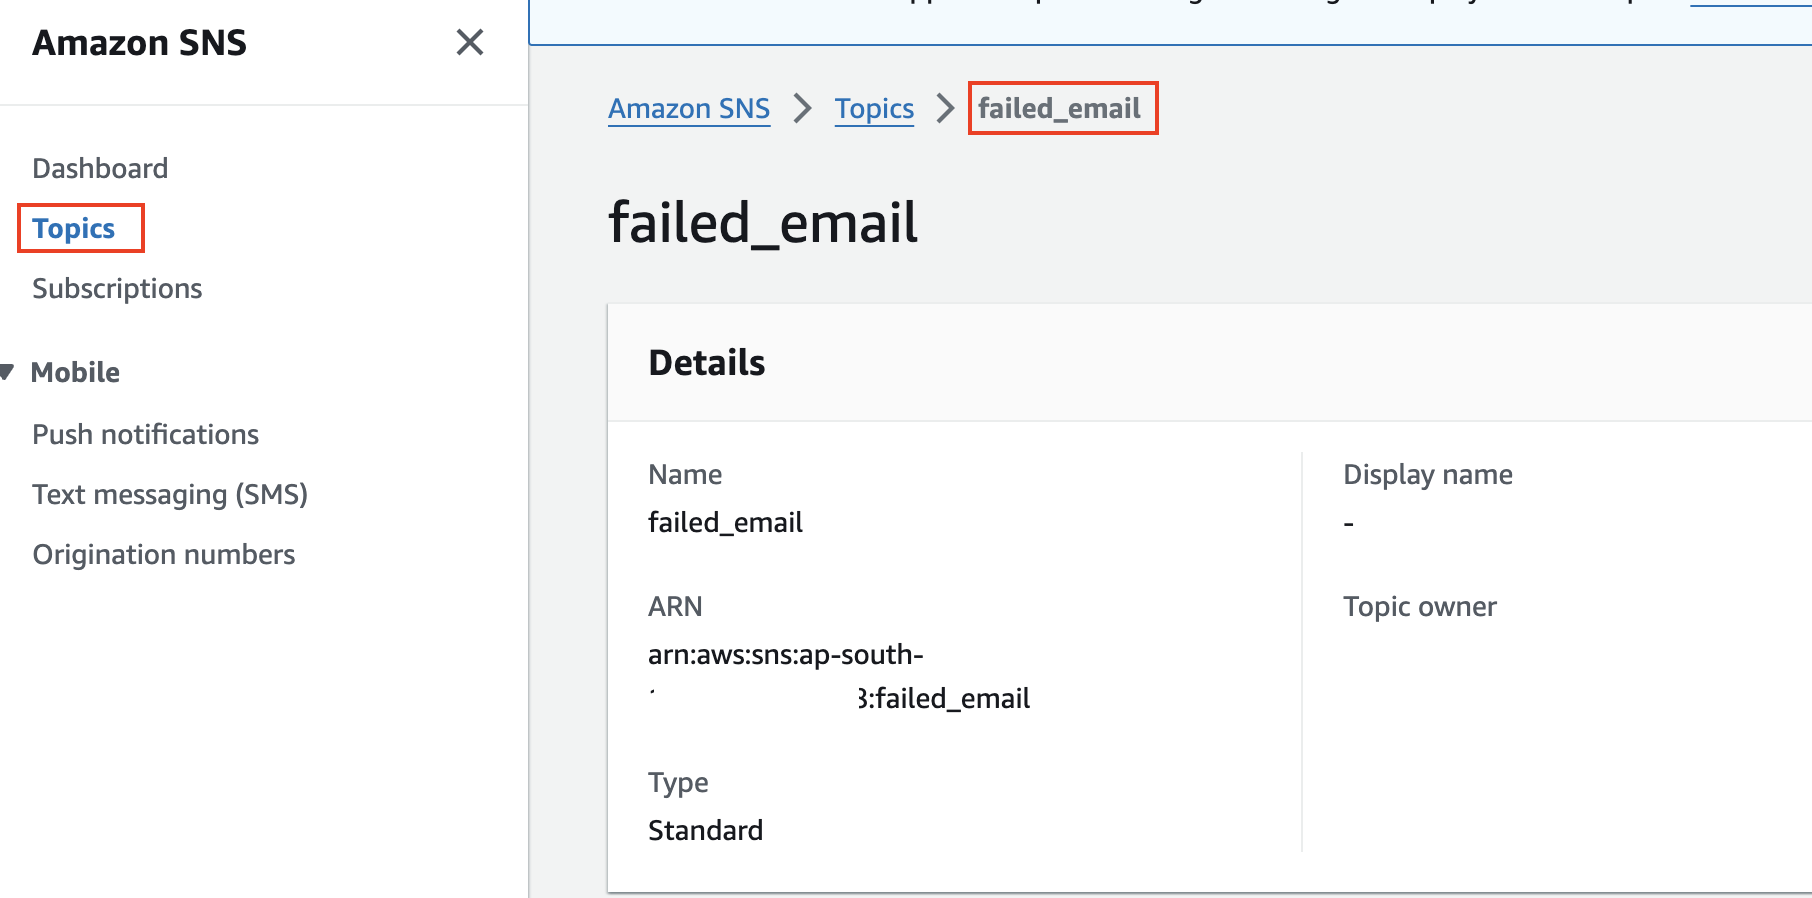
Scroll down to the Subscriptions section, click the Create button.
Choose the Topic ARN that you just created. Choose HTTPS as Protocol, and paste the Function URL you from the last step in the endpoint field.
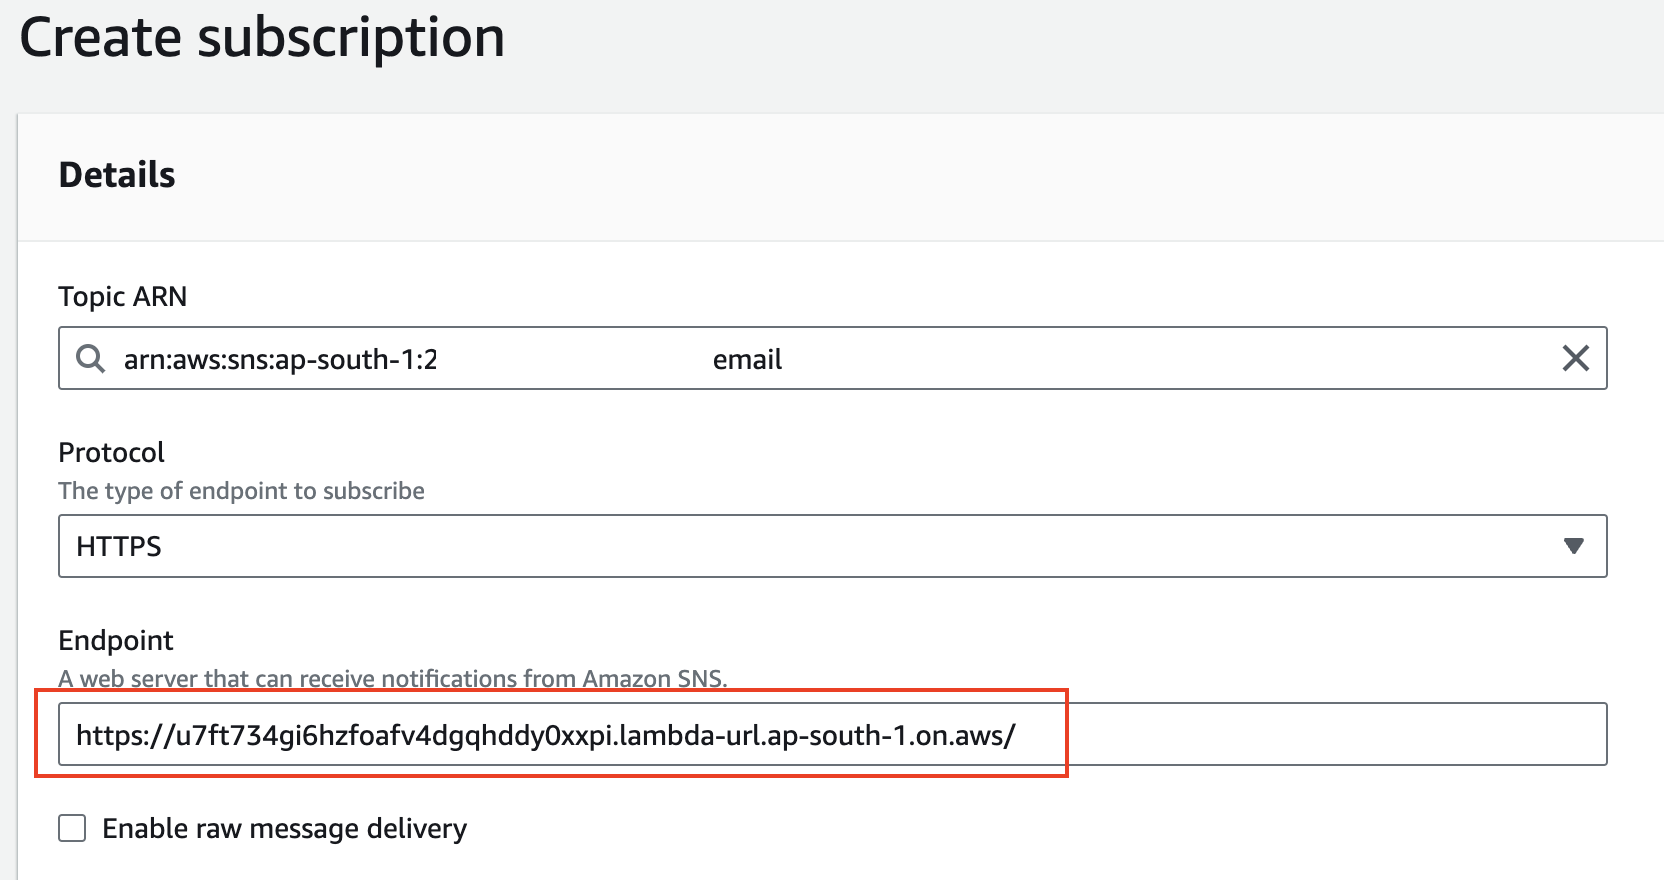
Click the Create Subscription button.